appnext

Rabu, 31 Oktober 2018

It's here: You can now talk to your Google Home in Hindi

You can now seamlessly switch between English and Hindi when conversing with your Google Home.

Google introduced the Google Home and Google Home Mini in India earlier this year, and while the smart speaker didn't have a lot in the way of features when it launched in the country, that's not the case anymore. Google announced that the smart speaker will pick up Hindi support at its Google for India event, and the feature is now live.

Google Assistant already works in Hindi, but that feature didn't extend to the Google Home until today. You can now seamlessly switch between English and Hindi when conversing with your Google Home. All you need to do is head into the Google Home app settings, go to the Assistant tab, and select Hindi as one of the languages for the voice assistant.

Google has also mentioned that Assistant usage has grown threefold over the course of the last 12 months, with customers asking over 100,000 cricket-related queries daily. Assistant now supports Marathi as well in addition to Hindi, and Google said it will pick up support for seven Indic languages in the coming months.

Amazon has a lead when it comes to the smart speaker market in India as Alexa has better integrations with local services, but the ability to talk to Assistant in Hindi — and further integration with local languages — gives Google an edge.

How to make your own PlayStation Classic

Don't settle for 20 games when you can have hundreds!

With the PlayStation Classic available for pre-order, a lot of people are excited to have some of their favorite games at their fingertips again.

But what if told you there was a way to have not just 20 of your favorites but all of them from both the PlayStation 1 and 2? Well, by using a Raspberry Pi microcomputer and few other bits and pieces, we can get you playing retro games in just a few minutes.

The following article hopes to help guide you down the path to your first Raspberry Pi retro emulation system.

Note: There are a myriad of ways to get your system up and running. This is simply the method that's most reliable and repeatedly works for me.

What you need

  1. A Raspberry Pi: Either the Raspberry Pi 2-B or the Raspberry Pi 3-B.. The biggest difference between the two is that the 3-B has built-in Wi-Fi and the 2-B does not.

  2. A Micro SD card: I use a Samsung 128GB EVO Select which affords me all the space I need. If you order from Amazon, it's suggested that you choose an SD which is listed as "Ships from and sold by Amazon.com" to avoid inferior counterfeit cards.

  3. A Micro-USB power supply to power your Raspberry Pi. You can even pick one up with a built-in power button for easy on and off.

  4. An HDMI cable to hook up to your TV or monitor.

  5. A USB Keyboard for use during setup.

  6. A USB game controller: You don't have to, but it just doesn't feel real unless you have the right controller. The official Sixaxis controller works great, but if you don't own one or want something a little cheaper, try this one

  7. A case to house your Raspberry Pi: This isn't completely needed, but if you access to a 3D printer, you can print up some amazing looking original PlayStation Pi cases. There are two that I like the look of and will be printing out to try. This one by The_Craft_Dude is a very realistic shape whereas this one by samhazel is designed to fit the Pi securely and even has room for an led power button!

On your computer: Setting up the image on the SD card

  1. Go to https://retropie.org.uk/download/ and download the "Raspberry Pi 2/3" image. Make sure to remember where you save it!
  2. Go to https://etcher.io/ and download the correct version for your system, then install. I prefer Etcher for its simple interface and compatibility with Windows, Mac, and Linux.

  3. Open up Etcher and click Select image.
  4. Navigate to where you saved your RetroPie image and select it.

  5. Next click Select drive.
  6. Choose your SD card (Make sure you select the correct drive letter. You don't want to write your OS drive with an image of Retropie!) Then click continue.

  7. Click the flash button.

It will take a few moments but once it's done writing you will have an SD card that's ready to roll!

On the Raspberry Pi: Initial setup for your RetroPie

  1. Insert your newly flashed micro SD card into your Raspberry Pi.
  2. Connect the network cable to your Raspberry Pi.
  3. Plug an HDMI cable to your Raspberry Pi and then to a TV or monitor.
  4. Plug your USB controller into your Raspberry Pi.
  5. Finally, plug your Micro-USB power supply into a wall outlet and to your Raspberry Pi. Your Raspberry by will now begin its first boot.

  6. Follow the on-screen instructions to configure your USB controller.

On the Raspberry Pi: Setting up your Wi-Fi connection

If you are not going to hardwire your system to the internet, now is the time to set up your Wi-Fi. You are going to need a USB keyboard to do that so go ahead and plug your keyboard into your Raspberry Pi.

  1. Navigate to the Retro Pie configuration page.
  2. Scroll all the way down to the bottom and select the Wi-Fi option.

  3. Next select Connect to Wi-Fi Network.
  4. Now select the network you wish to connect to.

  5. You will then be prompted to enter your Wi-Fi password. This is where you will need that USB keyboard.
  6. Once you have connected to your network, be sure to take note of your IP address.

Adding the games

Your new Raspberry Pi/RetroPie system comes with all the emulators you could need pre-installed. Emulators use things called ROMs in order to boot and play games. Think of ROMs as the modern-day equivalent of a game cartridge. No cartridge, no games, so you are going to have to load up your system with all the ROMs you want to play. Now, I can't tell you exactly where to pick up ROMs but if you have at least marginal google-fu skills, you should have no problem finding a resource that'll fulfill all your needs.

There are a few different methods of moving ROMs onto your system. My favorite method is to use RetroPie Manager. It allows you to move ROMs from the computer you downloaded them with directly onto to your Raspberry Pi using your computer's browser.

On the Raspberry Pi: Enabling RetroPie Manager

The first thing you are going to need to do is to enable RetroPie Manager on your Raspberry Pi.

  1. Navigate to your settings menu on your Raspberry Pi and select Retropie Setup.
  2. Select Manage Packages.

  3. Select Manage experimental packages.
  4. Scroll almost to the bottom and select Retropie manager.

  5. Select Install from source. Your system will now run a script which will download and install Retropie manager for you.

  6. Once it has completed select Configuration/Options.
  7. Select Enable Retropie Manager on boot.

  8. Finally, reboot your system.

Back on your computer: Moving the ROMs

The computer you are going to be using needs to have all your ROMs and it needs to be on the same network as your Raspberry Pi.

  1. Open the internet browser of your choice. In the address bar, enter the IP address of the Raspberry Pi which you noted earlier followed by ":8000". The address should look something like; 192.168.X.XXX:8000. This will take you to the RetroPie Manager page. There is all sorts of interesting and helpful data here, but for now, all you need to do is…
  2. Click on Manage Rom files for emulated systems.

  3. Here you will find all the emulated systems on your Raspberry Pi. Select the system you would like to add ROMs for and click on it.
  4. Now all you have to do is drag and drop your ROMs into this window. Easy Breezy!

  5. Once you have all your ROMs loaded onto your system, give your Raspberry Pi a reboot and you're all ready for a retro gaming party to beat the band.

Any questions?

Let us know in the comments below!

Samsung's SmartThings LTE Tracker is down to just $90 today

Buy this now, so you can find it later!

Right now you can pick up the Samsung SmartThings Tracker with real-time LTE and GPS for just $89.99, which is $10 less than it normally sells for. This device was only announced back in September, and has sold steadily at the $100 price point since then. There are other Bluetooth trackers available, but this option from Samsung is one of the first with real-time LTE built-in, which allows you to see its location from anywhere, even if you aren't right next to it. The first year of service is included with the purchase, and after that it's $5 a month or $50 a year to continue with the LTE subscription.

You can set up alerts for when the tracker arrives at or departs from a specific location, or when an SOS signal is sent. It's IP68 certified, which means it's water resistant, and rain won't destroy it. The internal battery is rechargeable and lasts 10 days per charge.

See at Amazon

Gboard now lets you make an emoji that looks just like you

The custom emoji are part of the Minis sticker pack.

New emojis are added to Android with every big software update, and while the collection of them is now more diverse than ever before, it can still sometimes be difficult to find one that looks just like you. Thanks to an update for the Minis sticker pack on Gboard, that's now changing.

To make your own Emoji Minis, open Gboard, tap the sticker button near the bottom and then the Mini icon. You'll be prompted to take a selfie, and using its machine learning tech, Google will create a custom emoji-style sticker based on your appearance. From there, you can fine-tune your look and customize your hair, face shape, hats, and much more.

Although you're technically making a sticker, it's designed to look just like Google's style of emoji for Android that's used in Oreo and Pie. Along with that, you can also use that same selfie to make Bold and Sweet style stickers.

Emoji Minis are rolling out to Gboard now for both Android and iOS.

Download: Gboard (free)

OnePlus 6T: Which RAM and storage size should you buy?

Best answer: If you don't have any preference on color, the base model of the OnePlus 6T with 6GB of RAM and 128GB of storage will make most people happy. It has plenty of memory and storage for average use. Pay extra for the Midnight Black glass finish or 256GB of storage if you don't mind the cost, but don't pay just to get more RAM.

OnePlus: OnePlus 6T ($549)

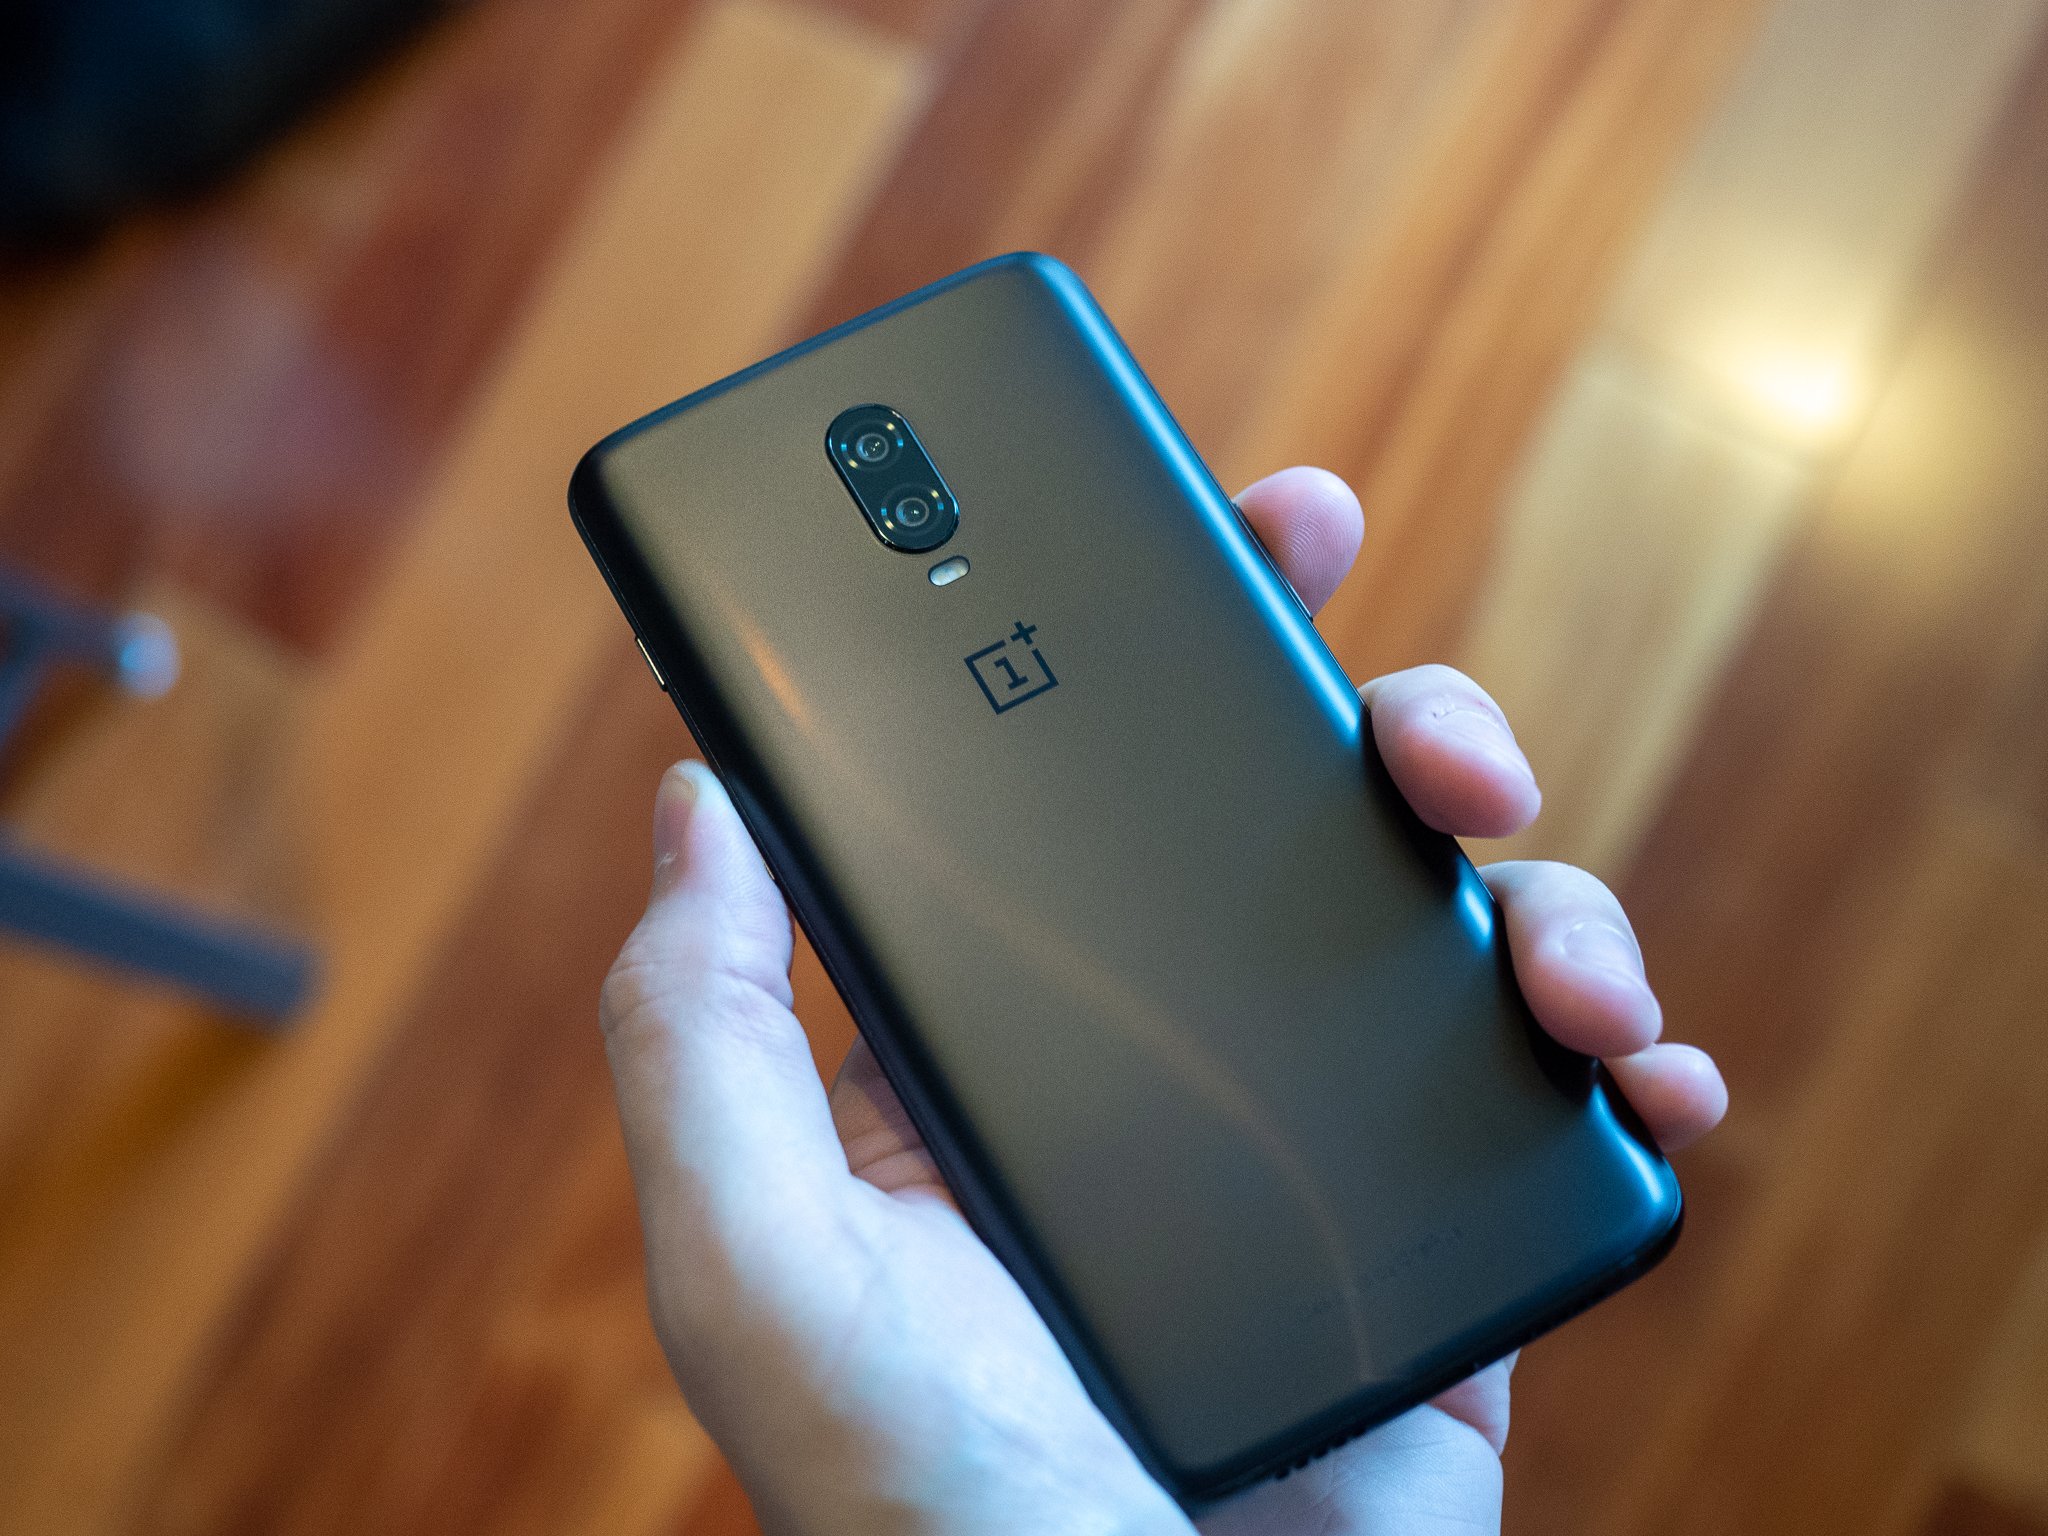
Choose a color you like

There are two different "colors" of the OnePlus 6T: Mirror Black and Midnight Black. They're both black ... but the finish applied to the glass is different. Mirror Black has a shiny exterior that picks up scratches and fingerprints much more easily, but has a bit more grip; Midnight Black has a soft frosted finish that's more slippery but doesn't gather fingerprints and just looks a whole lot nicer.

Unfortunately, you can't get every RAM and storage combination in both colors. So whether you care more about your storage or your color doesn't really matter, you still need to be aware of the color options before you settle on your desired storage. Here's how it breaks down:

  • 6GB RAM and 128GB storage: Mirror Black
  • 8GB RAM and 128GB storage: Mirror Black, Midnight Black
  • 8GB RAM and 256GB storage: Midnight Black

The color you'll see most often is Mirror Black on account of it being the only color available for the base model, so if you want to have something a bit unique, you'll need to up the RAM and get Midnight Black.

Pick the storage you need

Once you've picked your desired color, or at least come to terms with the color options you have, it's time to pick a storage option. 128GB in the base model is enough for most people, particularly because OnePlus is light with its software and gives you a lot of free space — less than 10GB is used out of the box. Just keep in mind that if you're used to a phone with an SD card slot, like a Samsung Galaxy, that the OnePlus 6T doesn't have that option. You're stuck with the storage you buy.

Most people will get by fine on 128GB; upgrading to 256GB will be a luxury.

Now, who should buy the 256GB model? Well, not that many people. Unless you intend to use your OnePlus 6 to store tons of local media and massive games, you aren't likely to fill up even 128GB. But if you know that you need 256GB based on where your current phone's storage stands, then you don't need this guide to tell you — just spend the extra money and get the storage, you won't regret it. The 256GB model is $80 more than the base model, which is industry-standard pricing.

More RAM is just a nice bonus

You'll notice we're talking about RAM last in this equation. That's because having 8GB of RAM is of dubious value right now.

Don't pay $30 extra just to get more RAM — 6GB is plenty.

Do you really need 8GB of RAM in the OnePlus 6T? The short answer is "no, but it's nice to have." With the base model phone having only 6GB of RAM and a vast majority of Android phones released today still having 4 or 6GB, there's very little that the extra memory can do for you because software and apps just don't expect it. It'll come in handy if you're running multiple intensive apps in addition to a game, under some circumstances, but really it's just preparing your phone for the (distant) future where apps and software become even more memory intensive.

Paying $30 more just to get 2GB of extra RAM isn't worth it, but it's a nice addition to get for "free" if you're paying to get the Midnight Black glass finish or the extra $80 to get 256GB of storage. So, again: pick your storage first and don't worry about RAM. The OnePlus 6T performs exceptionally with even 6GB of RAM.

Our pick

OnePlus 6T

$549 at OnePlus

6GB of RAM and 128GB of storage is the right amount for most people, and it's also the most affordable.

Most people will be just happy with 128GB of internal storage on their phone, and you'll be hard-pressed to notice the performance gain from upgrading to 8GB of RAM. So for most people, the base storage OnePlus 6T is the best choice — but if you want a different color more RAM or storage, it's inexpensive to upgrade.

Enjoy Yakuza, Bulletstorm, and more for November's PlayStation Plus games!

These are the free games you can get right now with your PlayStation Plus membership.

One of the biggest perks of having a PlayStation Plus membership is the free games you get every month. I've got a list of the games PlayStation is offering this month, and it includes some popular AAA titles. Start downloading these games, and enjoy your free games for the month of September!

PlayStation 4 free games this month

PlayStation 3 free games this month

PlayStation Vita free games this month

Full game line-up

Read on below to see some quick previews of the games you get for free this month!

Yakuza Kiwami

Play as Kazuma Kiryu — the Dragon of Dojima, as he's otherwise known — who sacrificed his freedom to protect his clan from the consequences of murdering a crime lord. He's served 10 years for the deed, but nothing is as he expected once he finally makes it out.

If you're not a PlayStation Plus member you can find this title on Amazon for $17.

$17 at Amazon.

Bulletstorm: Full Clip Edition

Bulletstorm is back with an upgraded Full Clip Edition. This edition of the game features the same great gory shooting fun, but includes upgraded performance, 4K visuals, and a new game plus mode.

If you're not a PlayStation Plus member you can find this title at Amazon for $19.

$19 at Amazon.

The Jackbox Party Pack 2

Who says party games are dead? Jackbox Party Pack 2 brings five great games to play with a group of friends, including Quiplash XL, an upgraded version of the original that features more players and more reaction prompts. Have fun with up to 7 other people.

If you're not a PlayStation Plus member you can find this title on the PlayStation Store for $25.

$25 at PlayStation Store.

Arkedo Series

Arkedo Series is a collection of puzzle-style games that draw inspiration from Tetris. There are three different games to sink your teeth into. Go for the high score each time you play!

If you're not a PlayStation Plus member you can find this title on the PlayStation Store for $6.

$6 at PlayStation Store.

Roundabout

Being a limosine driver isn't easy. In Roundabout, you chauffer some important figures from the 70s. The catch is that your limosine spins out of control at all times, so you'll need to master the wheel to take control of seemingly uncontrollable circumstances, all the while learning about your various passengers in live action fashion.

If you're not a PlayStation Plus member you can find this title on the PlayStation Store for $10.

$10 at PlayStation Store.

Burly Men at Sea

Set in 20th-century Scandinavia, Burly Men at Sea introduces you to three husky fishermen who bore of the sea and want for real adventure. Take them through a branching storyline featuring popular sea creatures from folklore.

If you're not a PlayStation Plus member you can find this title on the PlayStation Store for $10.

$10 at PlayStation Store.

Which is your favorite game you've gotten for free with PlayStation Plus?

Let us know which game you've loved and which one you're excited about this month! Drop a comment below or shoot me a Tweet and tell me all about it!

Updated November 2018: We've updated this list wth all the new free PS+ games for this month!

For just $3 a month, NordVPN can secure all of your web browsing

Keep your information away from prying eyes.

Have you ever stopped to think about how much of your day you spend connecting to networks that aren't your own? Whether you're working at a Starbucks, trying to finish something up at the airport before your flight, or sitting in the public library, odds are you're connected to a network that isn't the most secure without even thinking about it. Daily we do things like accessing our bank account, pay bills, send personal emails, and much more, all while not knowing if someone is tracking these moves and getting ready to steal your information.

Sounds a bit scary, huh? Well, personal information is something that should be kept personal, and luckily there are some easy ways to protect yourself. Odds are, by now you've heard of Virtual Proxy Networks, or VPNs, but you may be wondering why you would want to invest in one, right? Some of them can be a bit expensive, and others are unusually cheap, leaving you wondering which to end up with. NordVPN is one of the best services out there (and there's so much service you get from a good VPN), and right now you can grab a three-year subscription for just $107.55 when you use the code CYBEROFFER.

NordVPN offers double data encryption, which encrypts your data twice (and is the only company offering it), fast speeds, a strict no logs policy, automatic kill switch in case your VPN session drops off, and much more. The company has server locations in 57 different countries and covers every continent except for Antarctica (because penguins don't browse the web!). Don't take our word for it, though. Check out this helpful review from the folks at Windows Central. We consider it one of the best VPN apps for use on your phone, and there are plenty of great reasons to use one on your phone, too.

NordVPN offers a 30-day money back guarantee, so there is no risk in trying its service. You won't know if a VPN works for you until you give it a shot. Here is a way to try it without worrying about losing a boatload of cash, and if you like it then you score a sweet deal on the next three years of protection!

See at NordVPN