Beat Saber is one of the best titles on the Oculus Quest. It has you slash blocks and dodge bombs to the rhythm of pop, drum, bass, and more. While Beat Saber has a nice selection of songs built-in and has more songs through DLC, it falls short when it comes to most contemporary music. Thankfully, users have created custom song levels for Beat Saber.
Updated January 23, 2020: An update to Beat Saber stopped some methods for sideloading songs from working. This updated guide has a newer method that does work and the old method in case you're running an older version of Beat Saber.
Getting your Oculus Quest ready for sideloading
Sideloading content onto your Oculus Quest is relatively easy thanks to a program called SideQuest. You can check out our full guide to sideloading apps on the Oculus Quest or read the relevant steps for sideloading custom songs onto Beat Saber below. If you've already set up SideQuest on your PC, you can skip directly to the steps to prepare to install songs.
Note: Putting custom songs onto your Oculus Quest has removed save data in the past. The status of how it affects save data changes with different updates of SideQuest. Additionally, some people who sideload songs have run into issues, including seeing a black screen when trying to load Beat Saber.
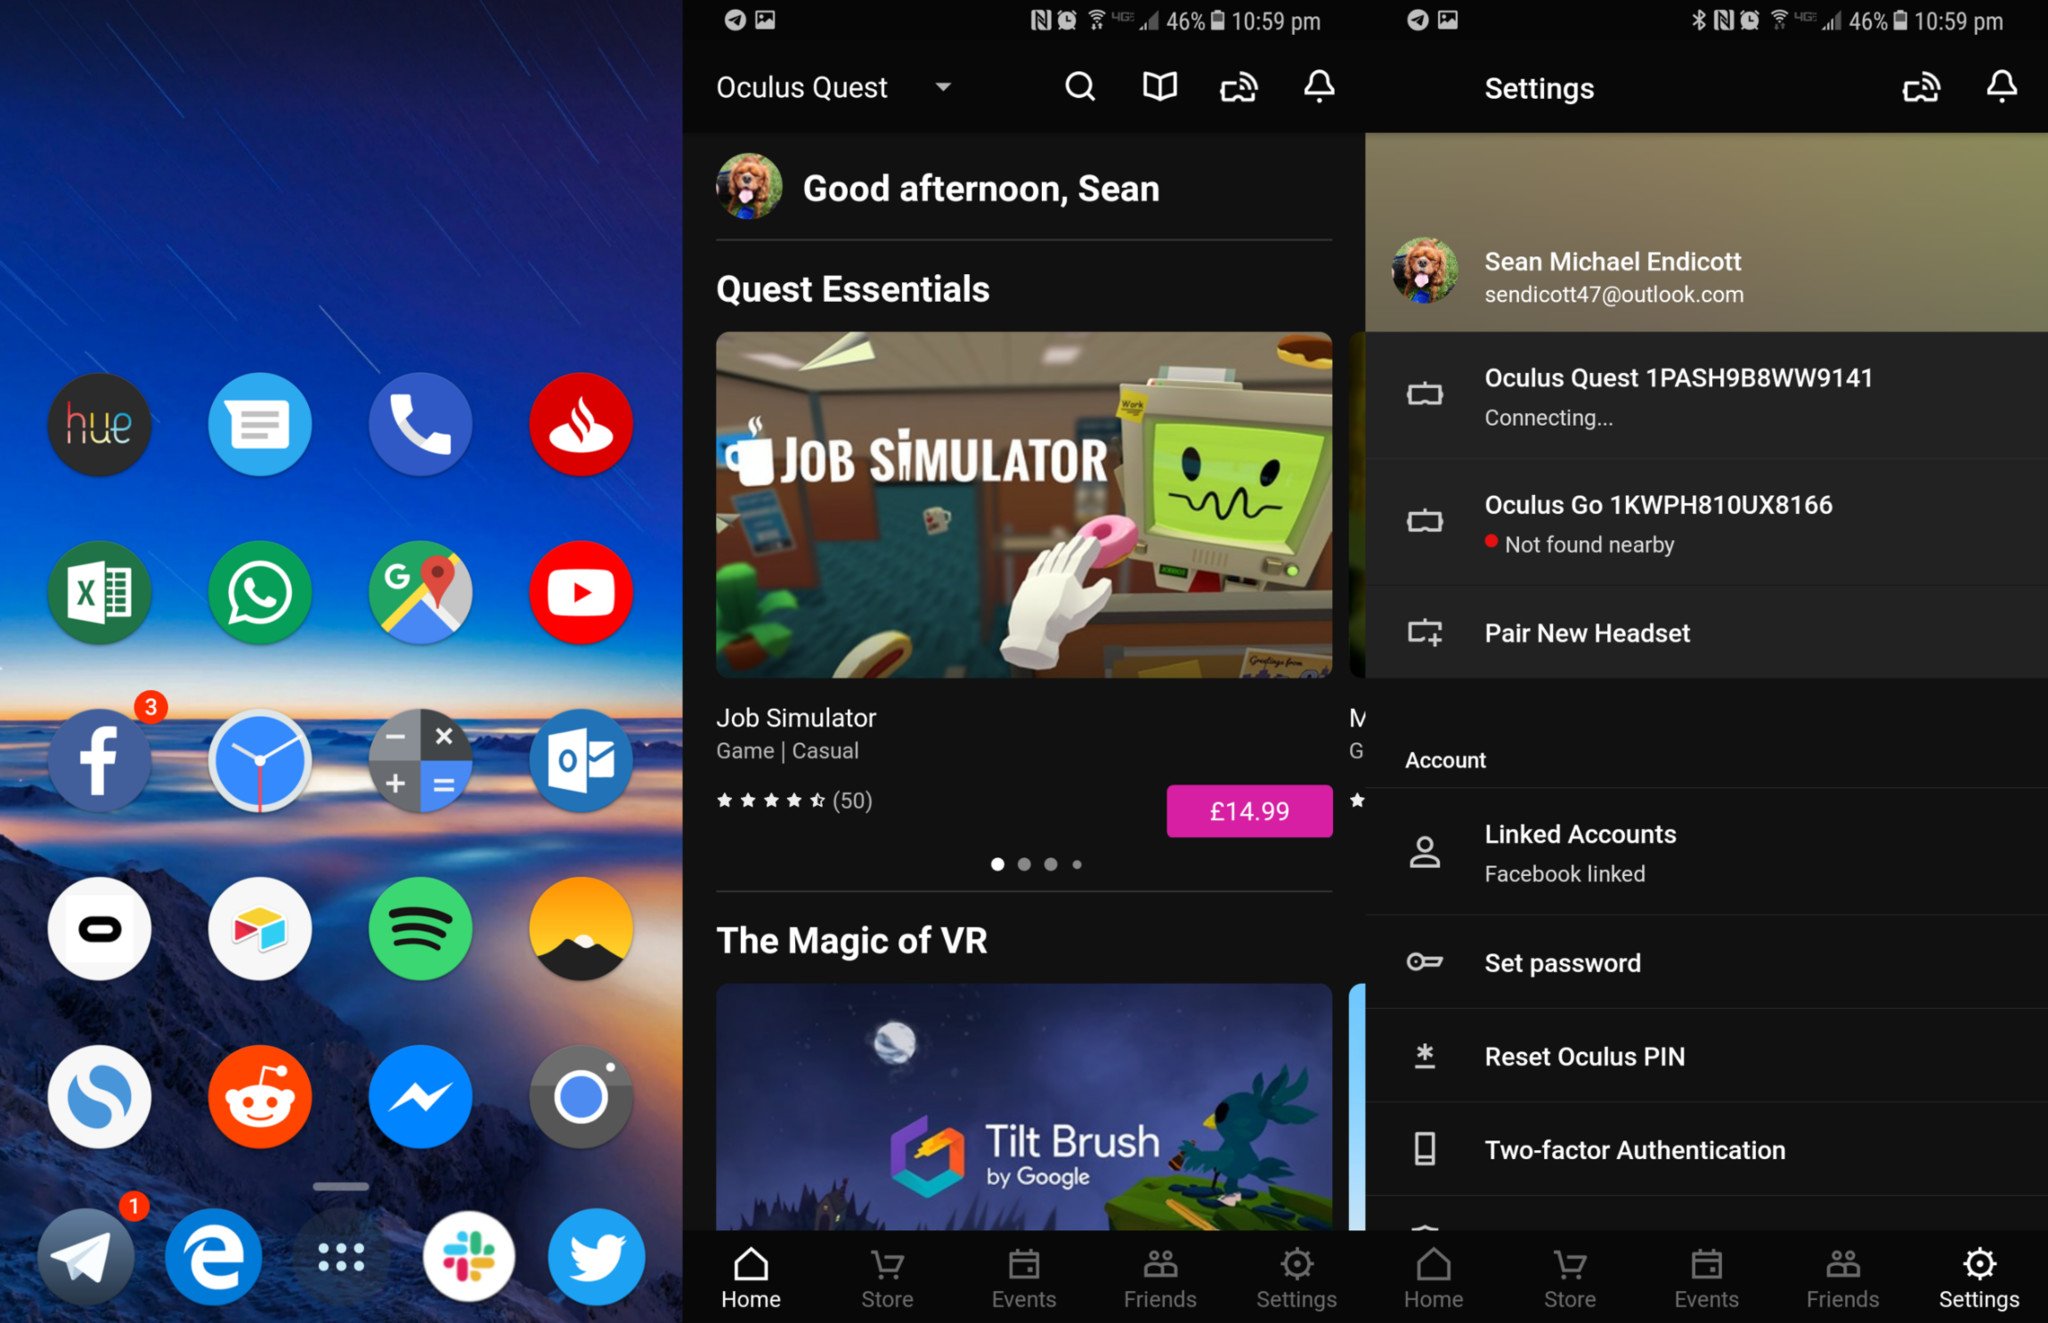
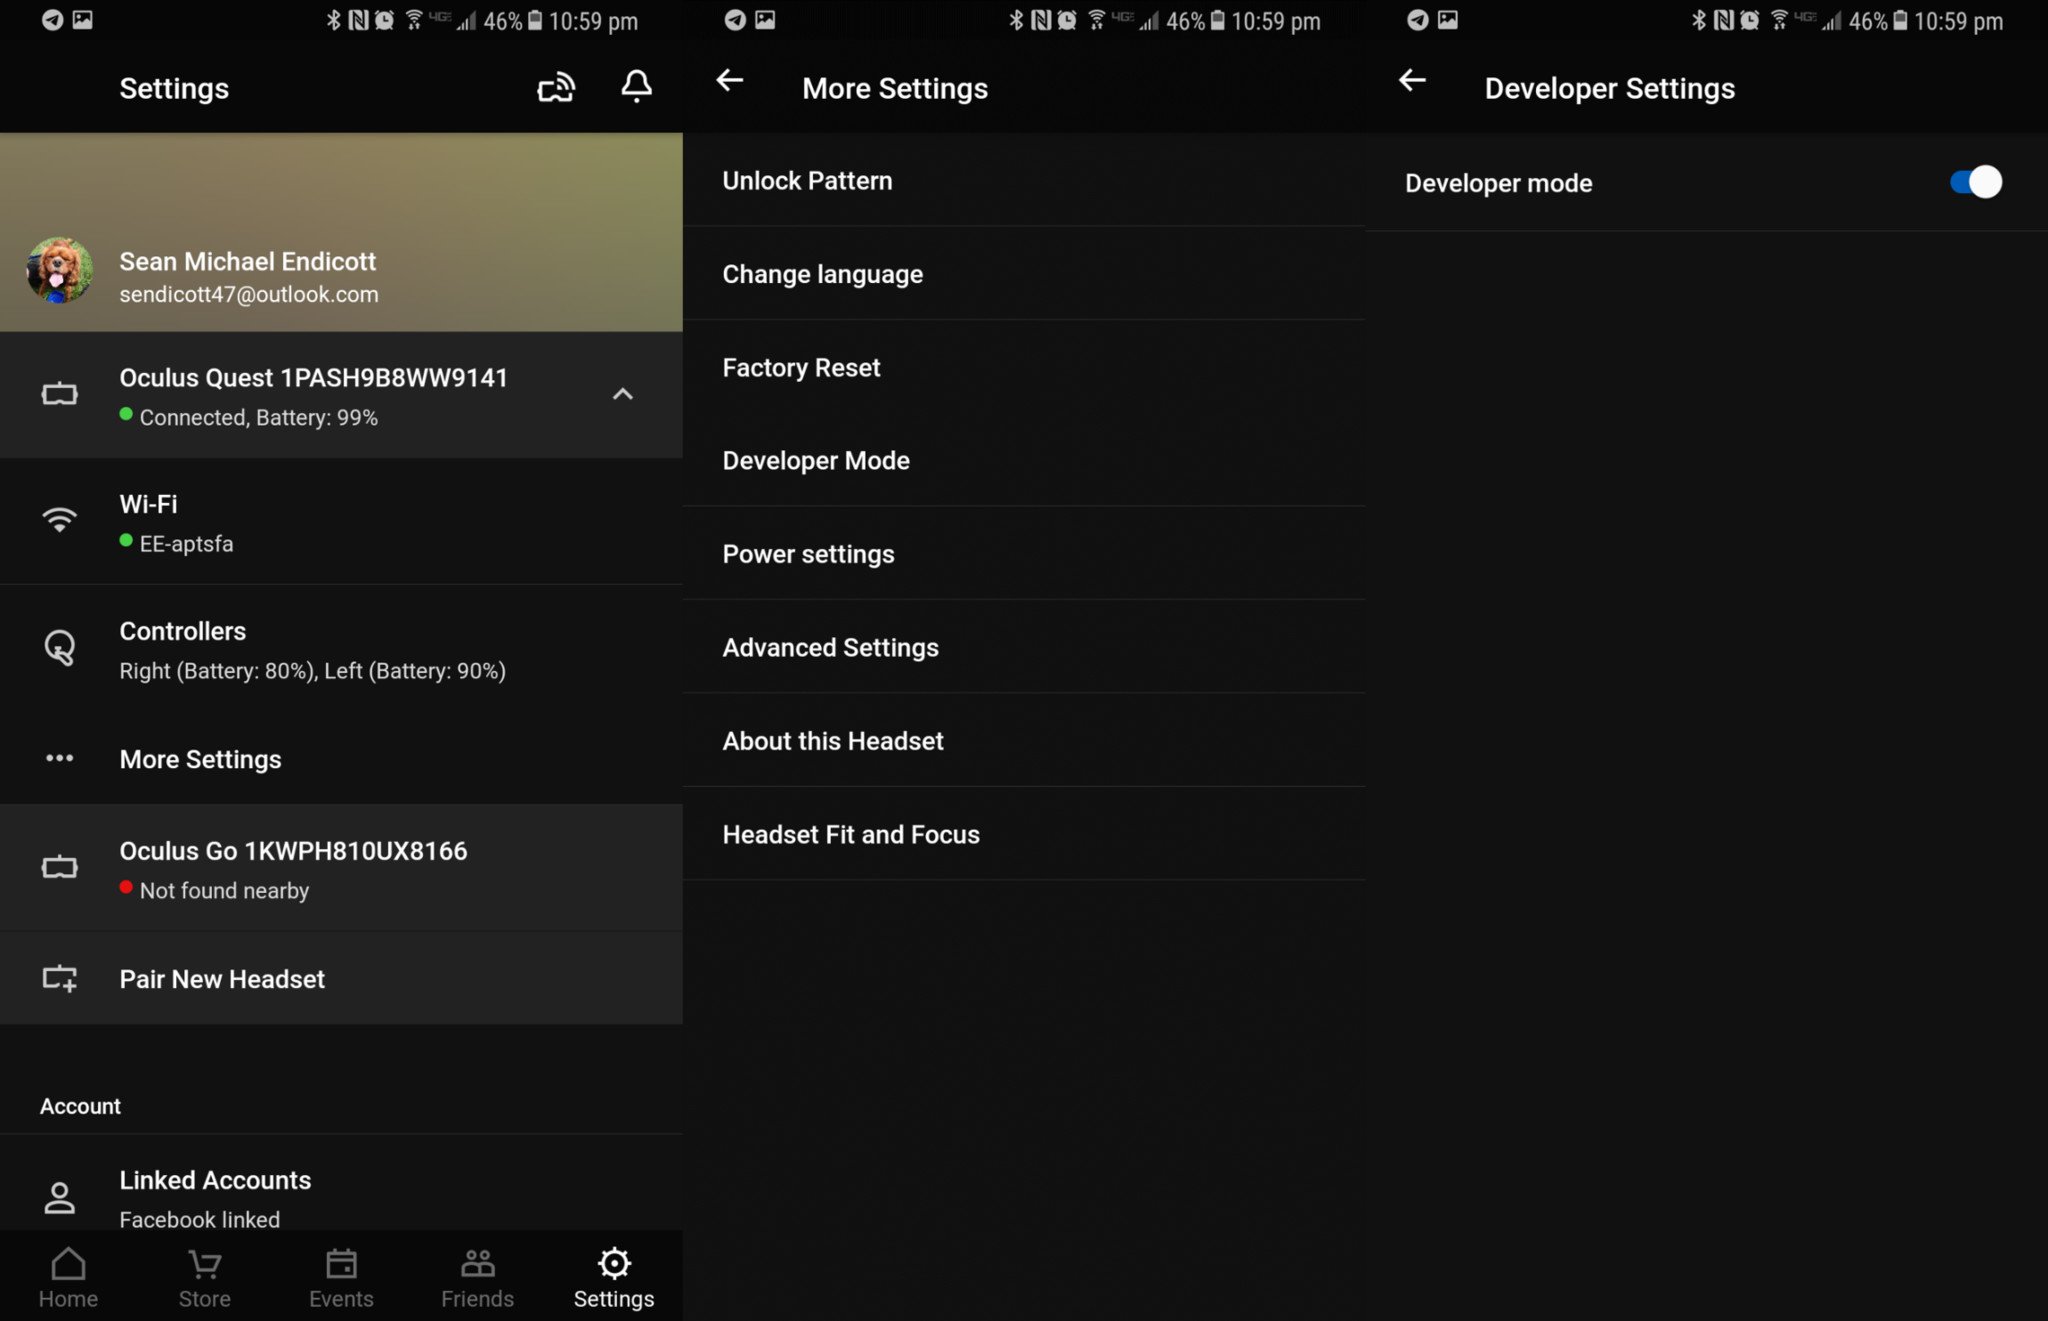
The first thing that you need to do with your Oculus Quest to sideload apps is enable developer mode. This is done through the Oculus app on your phone.
- Open the Oculus app.
- Select Settings.
-
Select your Oculus Quest headset.
- Tap the arrow to the right of your device name to drop down more options if they don't show up immediately after selecting your device.
- Select more settings.
- Select developer mode.
-
Toggle the developer mode setting to on.
- This opens a website (unless you've unlocked developer options on an Oculus device before).
- Scroll down and select the link below create an organization.
- Log in to your Oculus account
- Enter the name of your "organization" (this can be anything).
- Select submit
- Agree to the terms of agreement.
- Open the Oculus app again.
- Select Settings.
- Select your Oculus Quest headset.
- Tap the arrow to the right of your device name to drop down more options if they do not show up immediately after selecting your device.
- Select more settings.
- Select developer mode.
- Toggle the developer mode setting to on if it isn't already switched on.
How to set up SideQuest on your PC
Next, you'll need to get SideQuest ready on your PC. You'll have to download SideQuest from GitHub and install it. It's an executable file, so if you've used those before, it should work as any other. You can download it on Windows, Mac, and Linux, but here's a step-by-step breakdown of the process on Windows.
- Go to SideQuest's Github page.
- Download the version appropriate for your device.
- Click on the downloaded file.
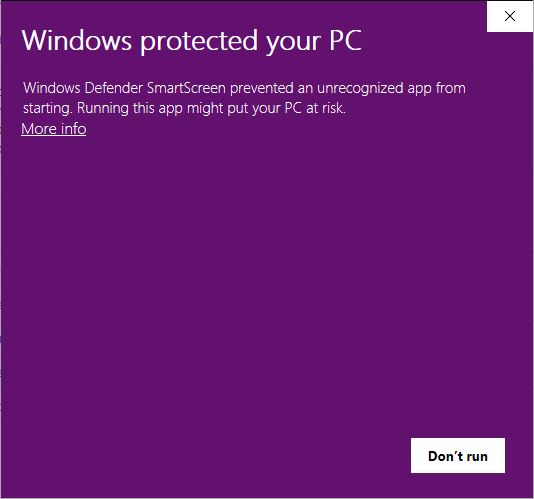
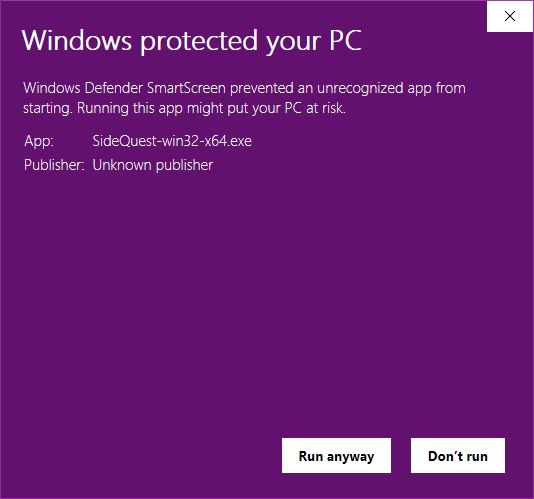
- You'll get a pop-up from Windows that says, "Windows protected your PC." Select more info.
-
Click Run anyway.
- Click extract.
- Open the folder that you extracted it to.
- Find the folder SideQuest-win32-x64.
- Double click SideQuest.exe.
How to connect your Oculus Quest and SideQuest
To set up SideQuest and to install any applications, you'll need to connect your Oculus Quest and your PC.
- Connect your Oculus Quest to your PC using a USB-C cable.
- Select Connect Device in SideQuest
- Put on your headset, and select Allow USB debugging.
- Make sure to check Always allow from this computer.
- Install the App Launcher by selecting Install App Launcher on SideQuest on your PC.
The app launcher creates an Unknown Sources folder in your Oculus Quest's library so you can easily find apps and games that you've sideloaded. You can now install APKs onto your Oculus Quest.
Create a backup
While we haven't run into any issues sideloading custom songs onto the Oculus Quest, it's always a safe practice to create a backup. That way, you can restore previous versions if anything goes wrong. SideQuest has a tool built-in to create and manage backups.
- Select browser.
- Select my downloads.
- Select backups.
- Scroll down to Beat Saber and select the settings icon
- Select backup APK file.
You now have a backup of your Beat Saber APK in case anything goes wrong. You can also use this same section of SideQuest to backup and manage backups of apps you have on your Oculus Quest.
Installing BMBF and preparing to sideload songs
BMBF is a relatively new way to sideload songs onto Beat Saber. BeatOn and some other methods of sideloading songs stopped working after Beat Saber updated to version 1.6. If you have a newer version of Beat Saber, you'll need to use BMBF to sideload songs.
The first thing is to download BMBF from GitHub and install it onto your Quest.
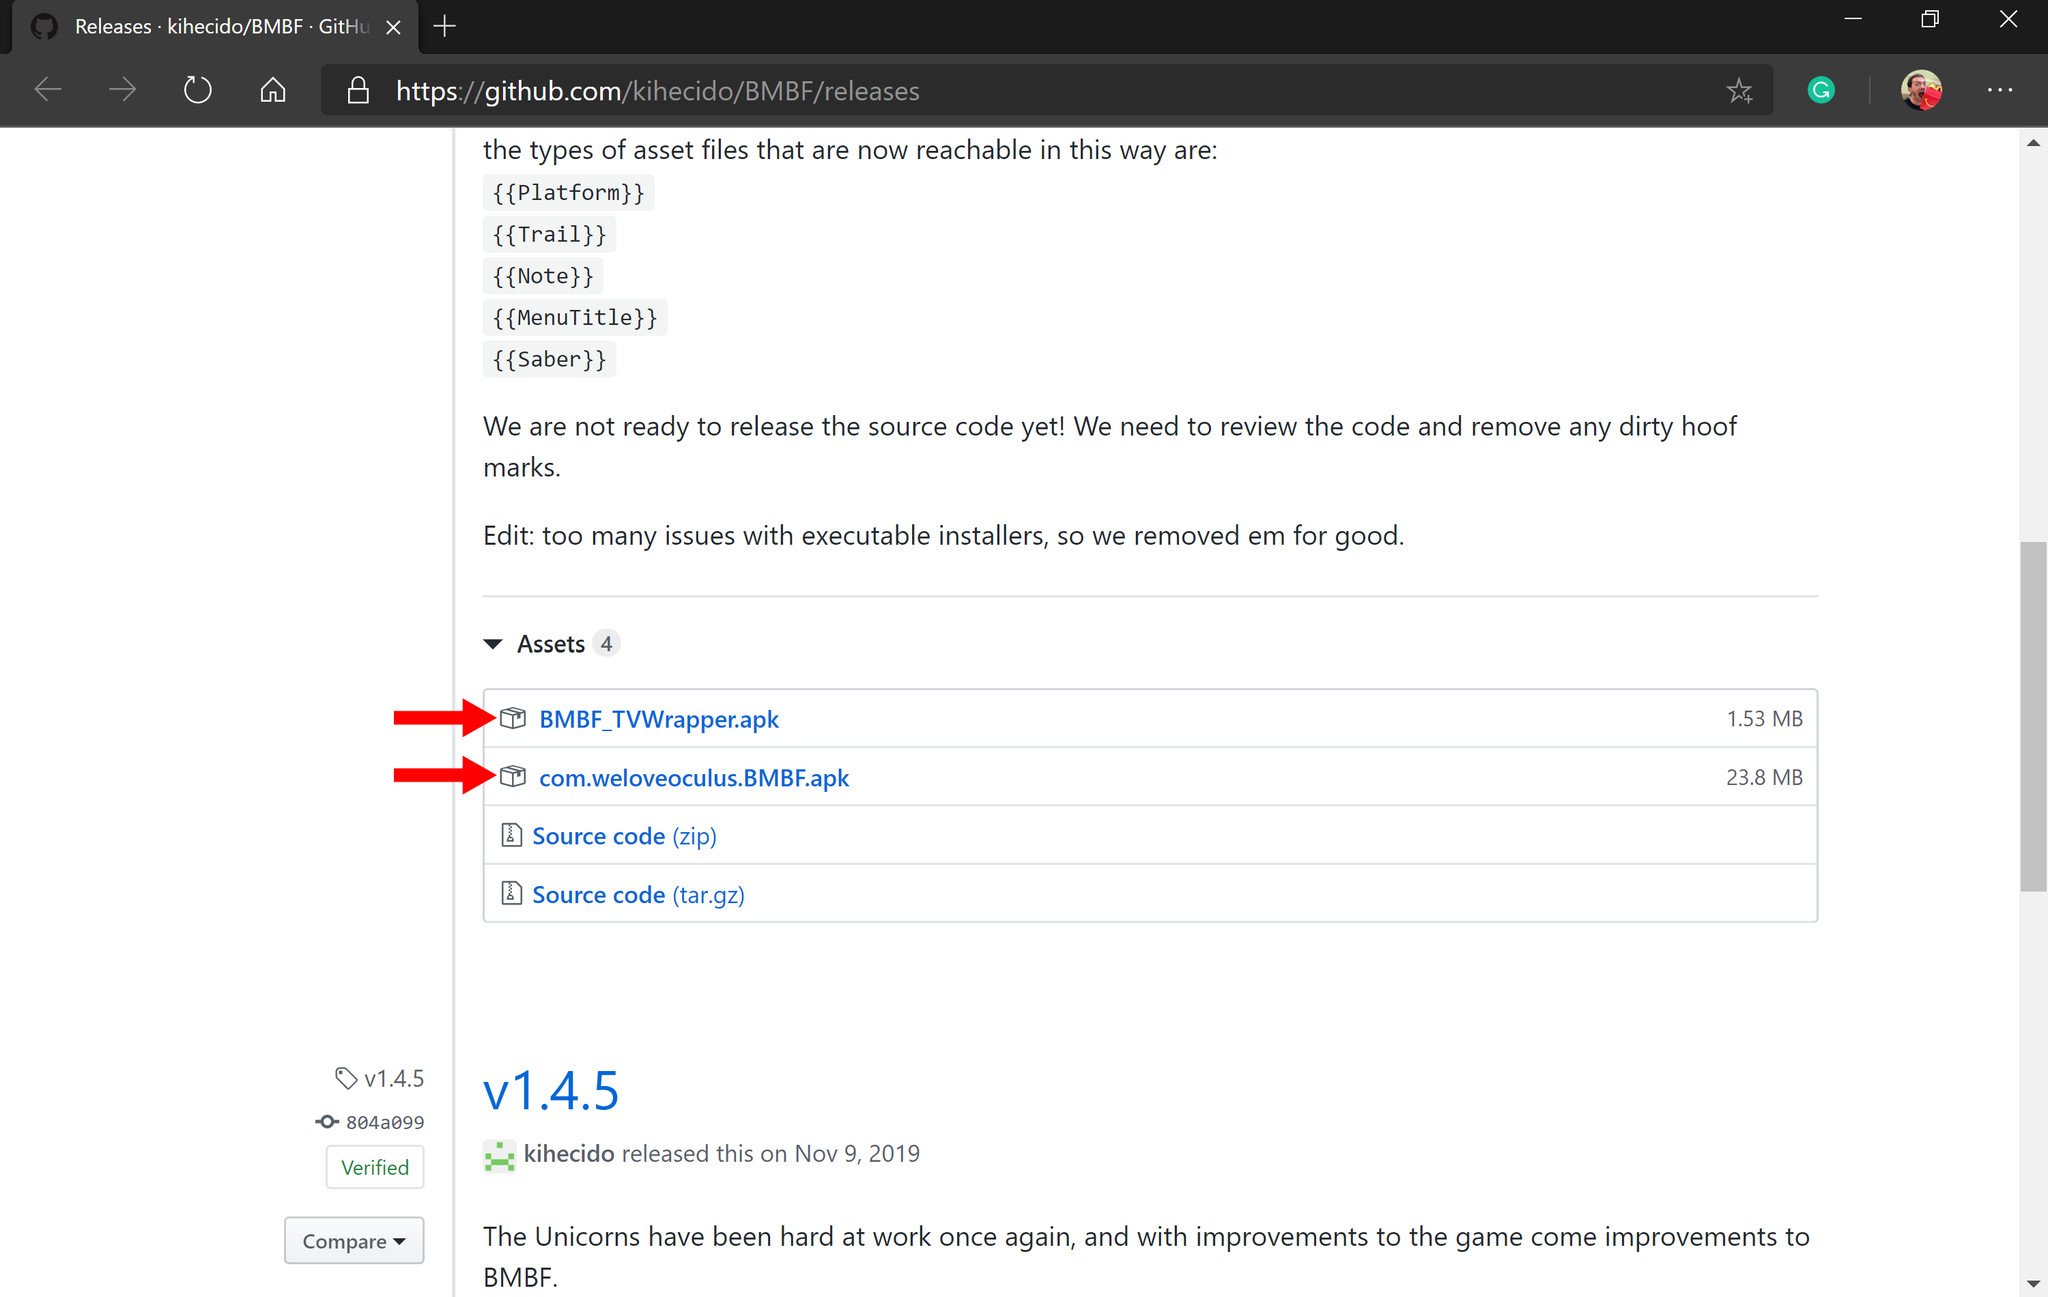
- Go to the BMBF GitHub page.
- Download the latest BMBF apks (note that you need the "com.weloveoculus.BMBF.apk " and the "BMBF_TVWrapper.apk" files).
-
Install BMBF onto your Oculus Quest by dragging the APK files onto the SideQuest logo of SideQuest. Alternatively, you can use the Install APK from File Folder option on the title bar of SideQuest.
- Put on your Oculus Quest.
- Open Oculus TV
- Open Channels
- Select Unknown sources
- Select BMBF
- Scroll down on the first page BMBF loads and select Continue.
- Select Uninstall Beat Saber.
- When asked if you want to uninstall Beat Saber, select ok.
- Select Patch Beat Saber (Note that this step can take a while).
- Select Install Modded Beat Saber.
- Select Install.
- Select Done.
You're now ready to sideload songs!
Sideloading songs
The easiest way to sync songs to your Oculus Quest is to use SyncSaber. This is built right into BMBF, so you don't need to install more software. You do, however, need an account that works with SyncSaber.
The first few steps are easiest to do on a computer.
- Go to the bsaber.com.
- Select Log in.
- Enter your desired username and a valid e-mail address.
- Go to your e-mail and follow the link to create a password.
Now, put on your Oculus Quest for the next steps.
- Open BMBF.
- Select the SyncSaber tab on the top of the screen.
- Enter your Beast Saber username.
You can now actually sideload songs! To sideload a song just follow these steps:
- Browse the BMBF website, which you get to by opening BMBF and the Oculus Quest.
-
For any song that you'd like, just select the Arrow icon for "Download a zip file from Beat Saver."
- When you've selected all your songs, select Sync to Beat Saber in the upper right-hand corner.
- Select Start Beat Saber in the upper right-hand corner.
- The first time you do this, it will prompt you to allow storage permission for Beat Saber, select Allow.
You can now install and play custom songs on Beat Saber!
How to install custom songs onto Beat Saber
Following an update of Beat Saber to version 1.6, some older methods of sideloading songs no longer work. We've left this here in case you've elected to keep an older version of Beat Saber.
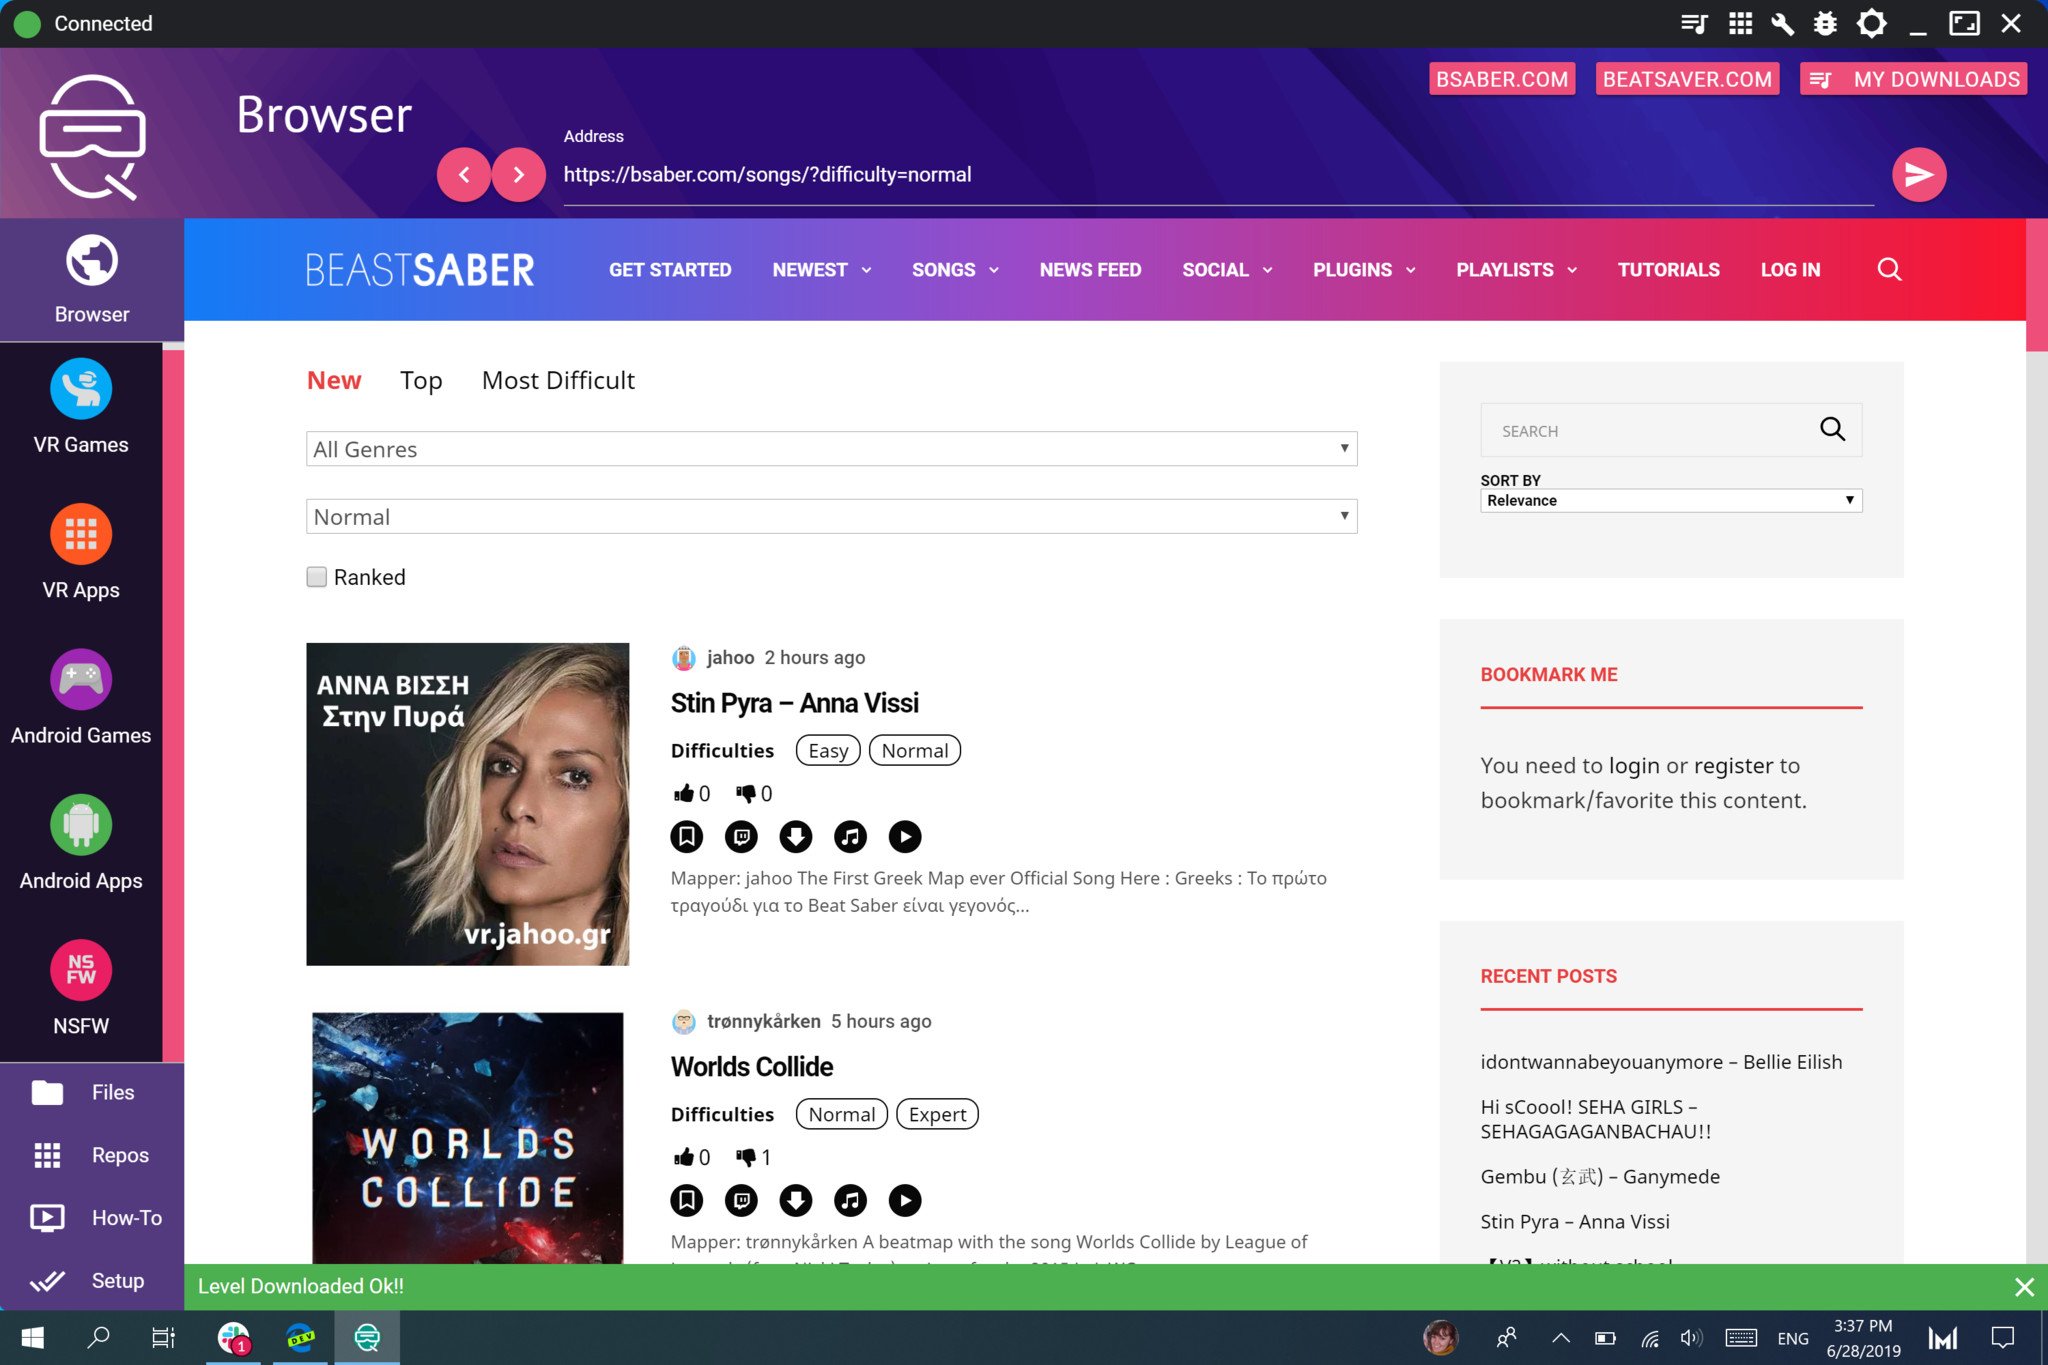
- Click on browser on the left panel of SideQuest.
- Navigate to https://bsaber.com (the browser opens on this page by default).
-
Click on the songs dropdown menu and go to the category you'd like to select music from, such as "most liked this week."
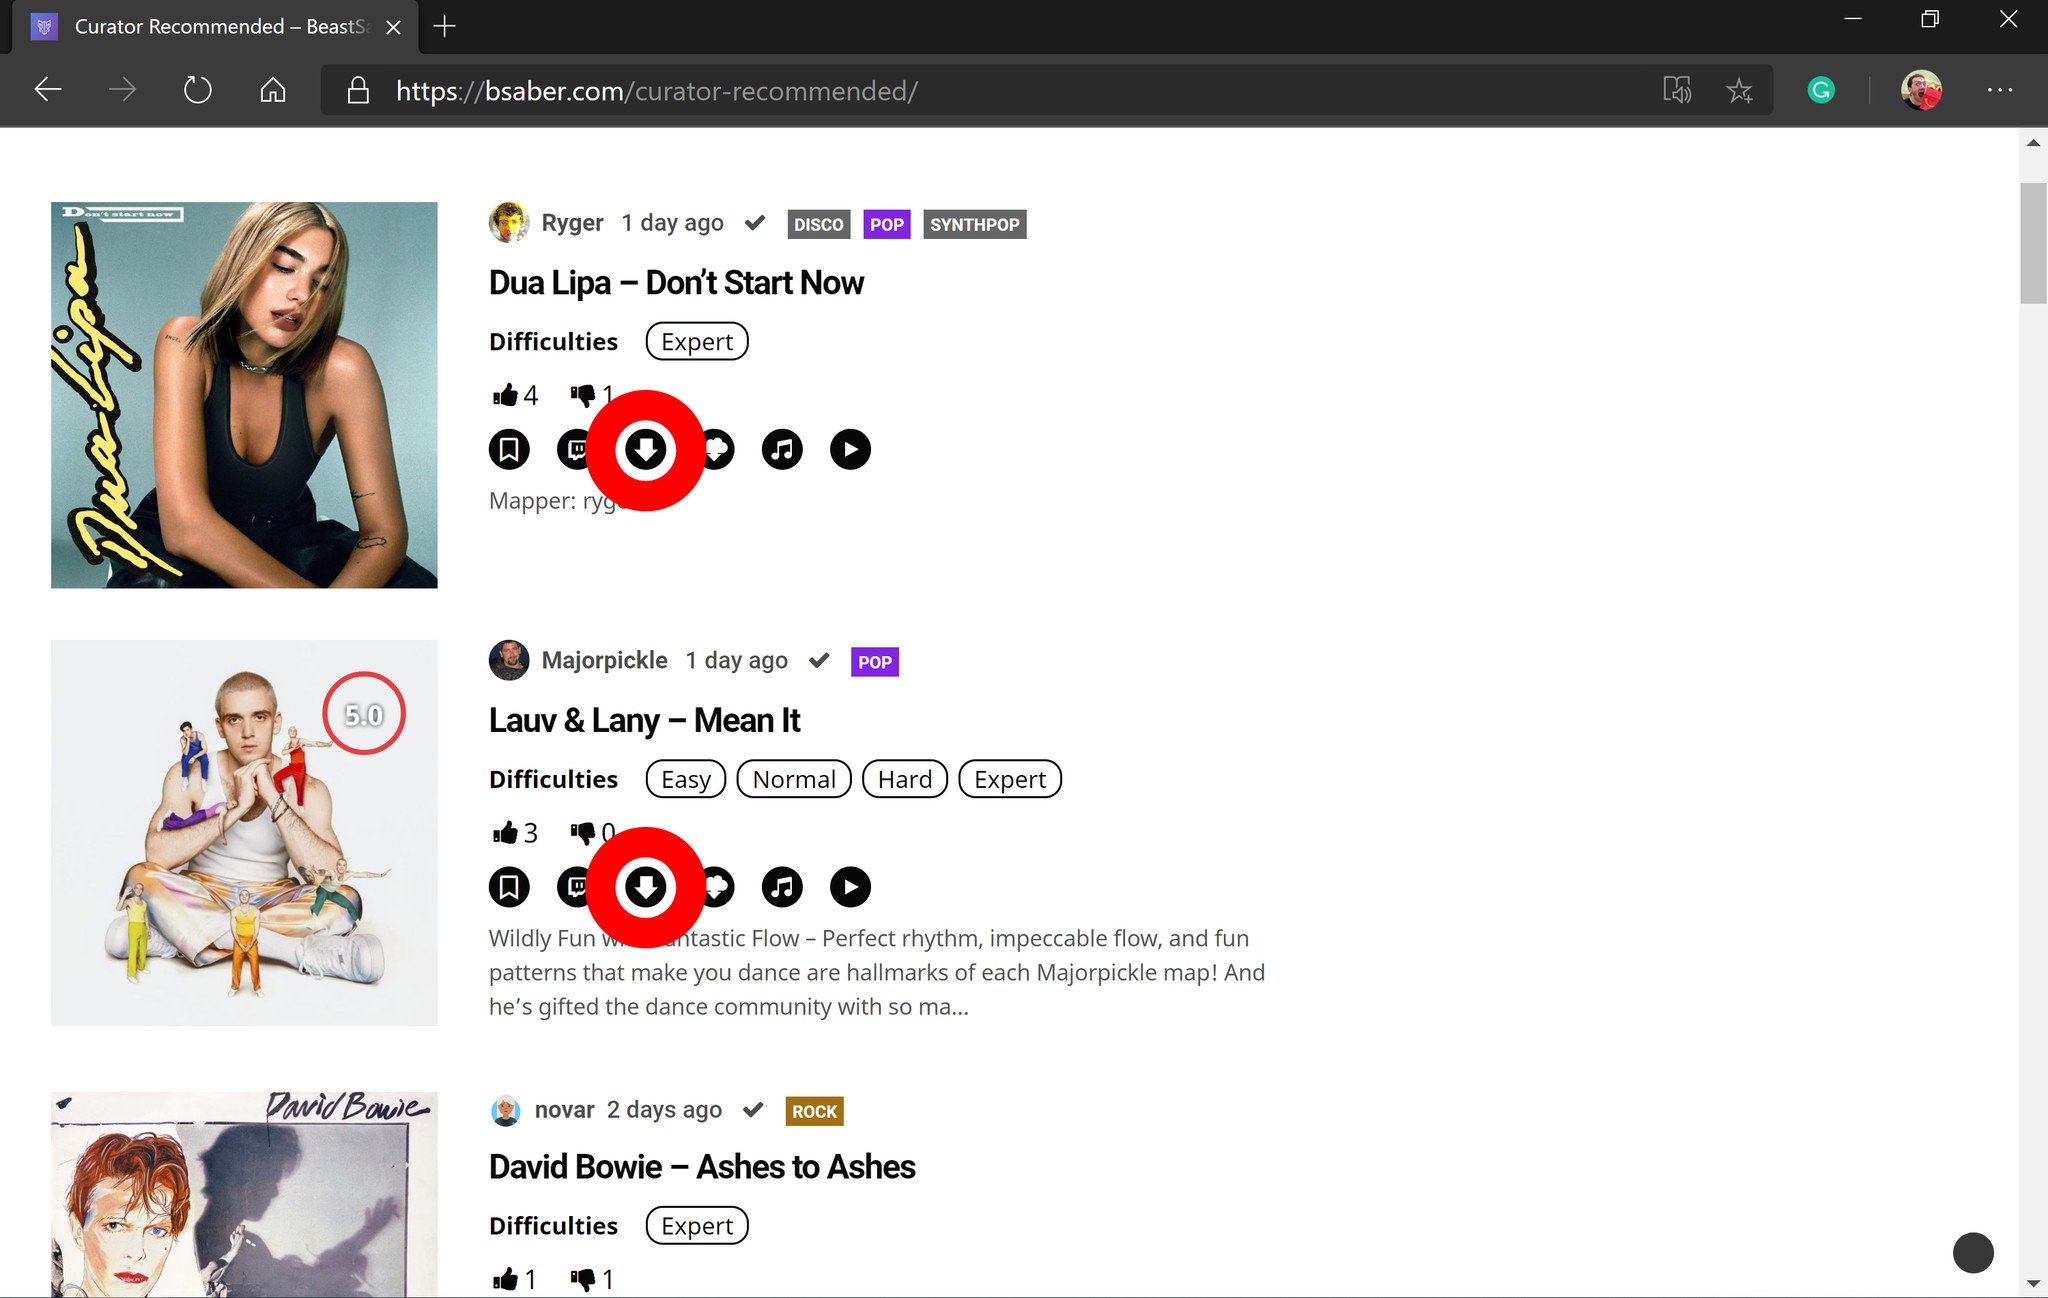
- Tap on the down arrow icon to download any song that you'd like.
- Click on My Downloads in the upper right-hand corner of SideQuest.
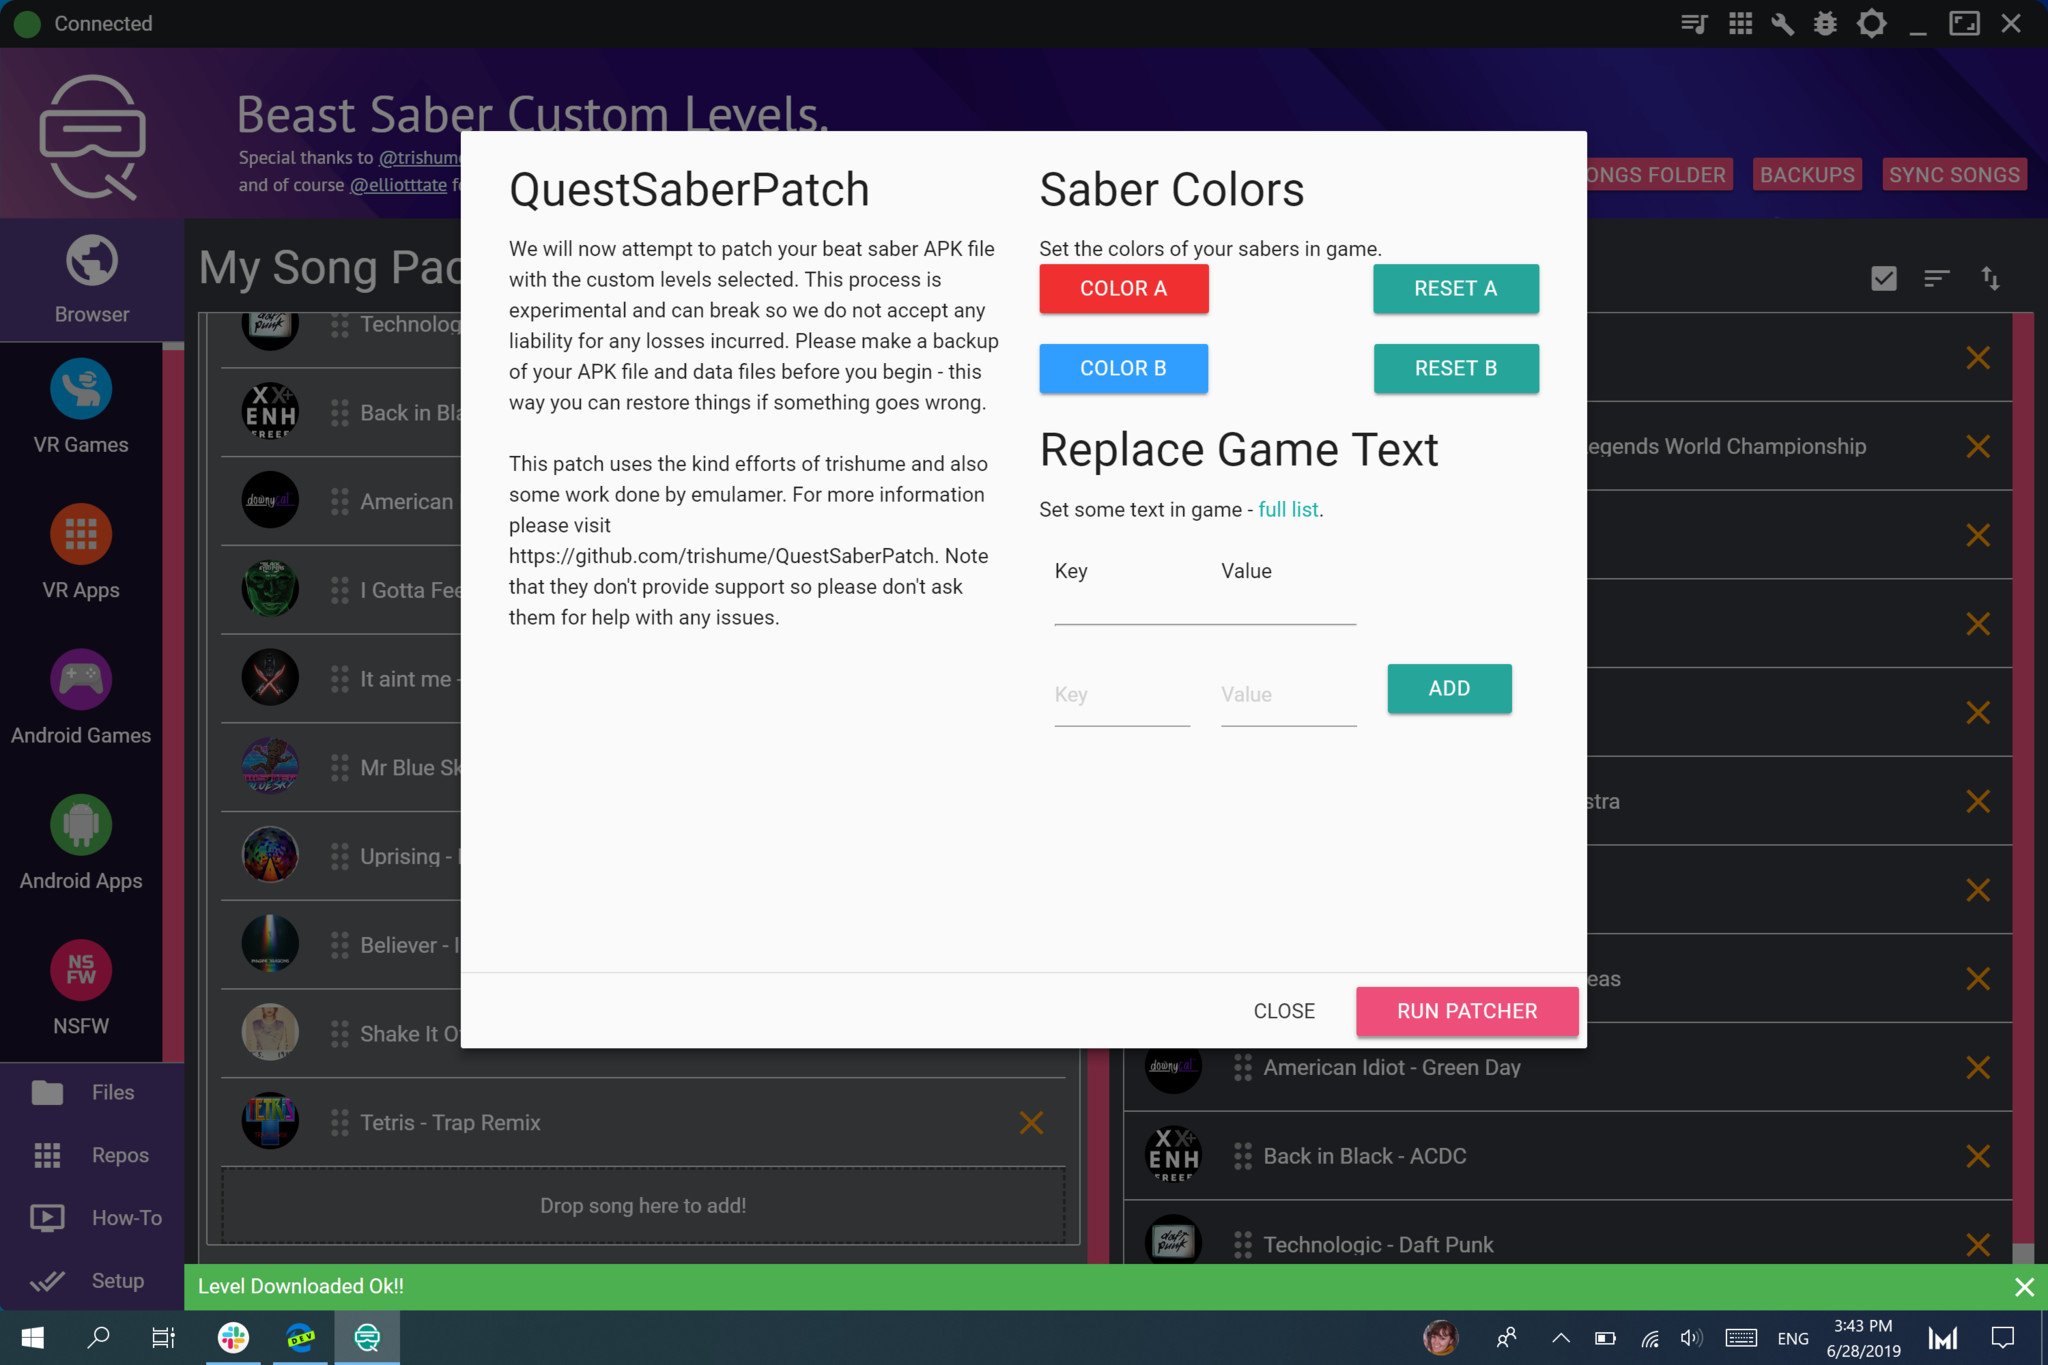
- Drag and drop songs into My Song Packs.
- Select sync songs.
-
Select run patcher. This creates an APK that can be put onto your Oculus Quest.
- Select install APK.
You're good to go! The custom songs are now on your Oculus Quest. To play them, select the custom maps section within Beat Saber.
Untethered VR
Oculus Quest
$399 at Amazon $399 at Walmart
Freedom to move
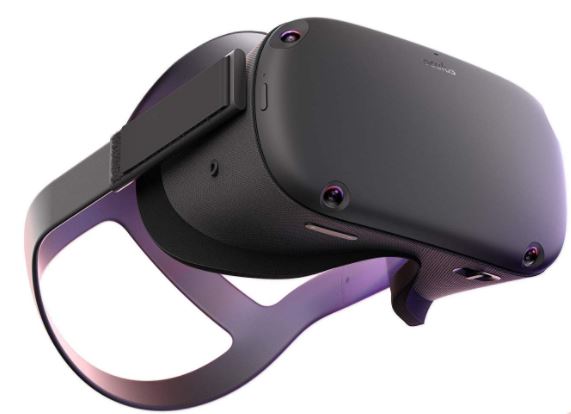
The Oculus Quest is a standalone VR headset. That means you don't need a PC or phone to use it, and you don't have to duck and dodge around wires. As a result, you can bring VR almost anywhere and immerse yourself in gameplay.
Additional Equipment
The Oculus Quest has everything you need to run it in the box, but you can still add some accessories to enhance the experience and help you take it with you.
Oculus Quest Travel Case
This case will protect your Oculus Quest when you're on the go and has enough room for the headset and Touch Controllers.
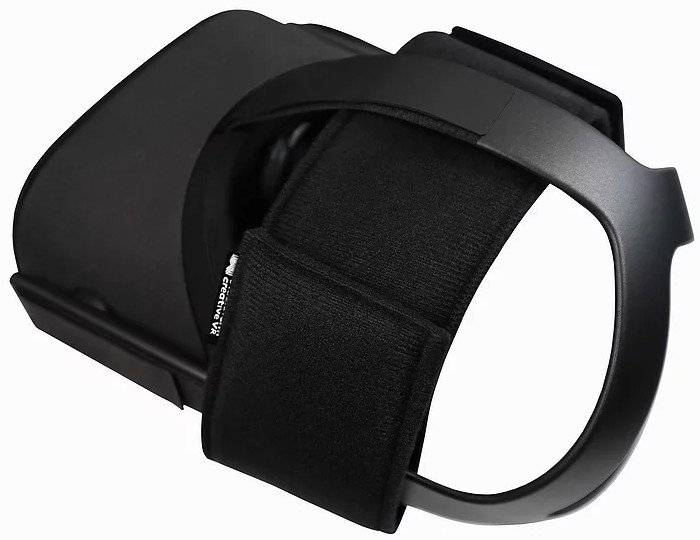
Quest Deluxe Strap
This adds another layer of support to the head strap built into the Oculus Quest. It helps distribute weight across your head to improve comfort, which is important for longer sessions.
Panasonic rechargeable batteries
These batteries can be recharged up to 2,100 times and are a great way to keep your Touch Controllers charged and ready to go.



Tidak ada komentar:
Posting Komentar