Sometimes if you want something done right, you need to do it yourself.
One of the main selling points of the PS4 Pro is its power advantage over the PS4 Slim, allowing for crisper images and faster frame-rates. Not every game supports 4K resolution, but those that do are all the better for it. Though the PS4 Pro should automatically enable 4K resolution support when it detects a 4K-capable monitor, this isn't always the case.
Here's how to enable 4K manually when your PS4 Pro just doesn't do its job right.
How to enable 4K on your PS4 Pro
For starters, you'll want to make sure that your PS4 is indeed connected to a 4K-capable monitor, and that your display is also set to output at 4K resolution. How to access these settings may be different depending on the brand you are using. As for the PS4 Pro:
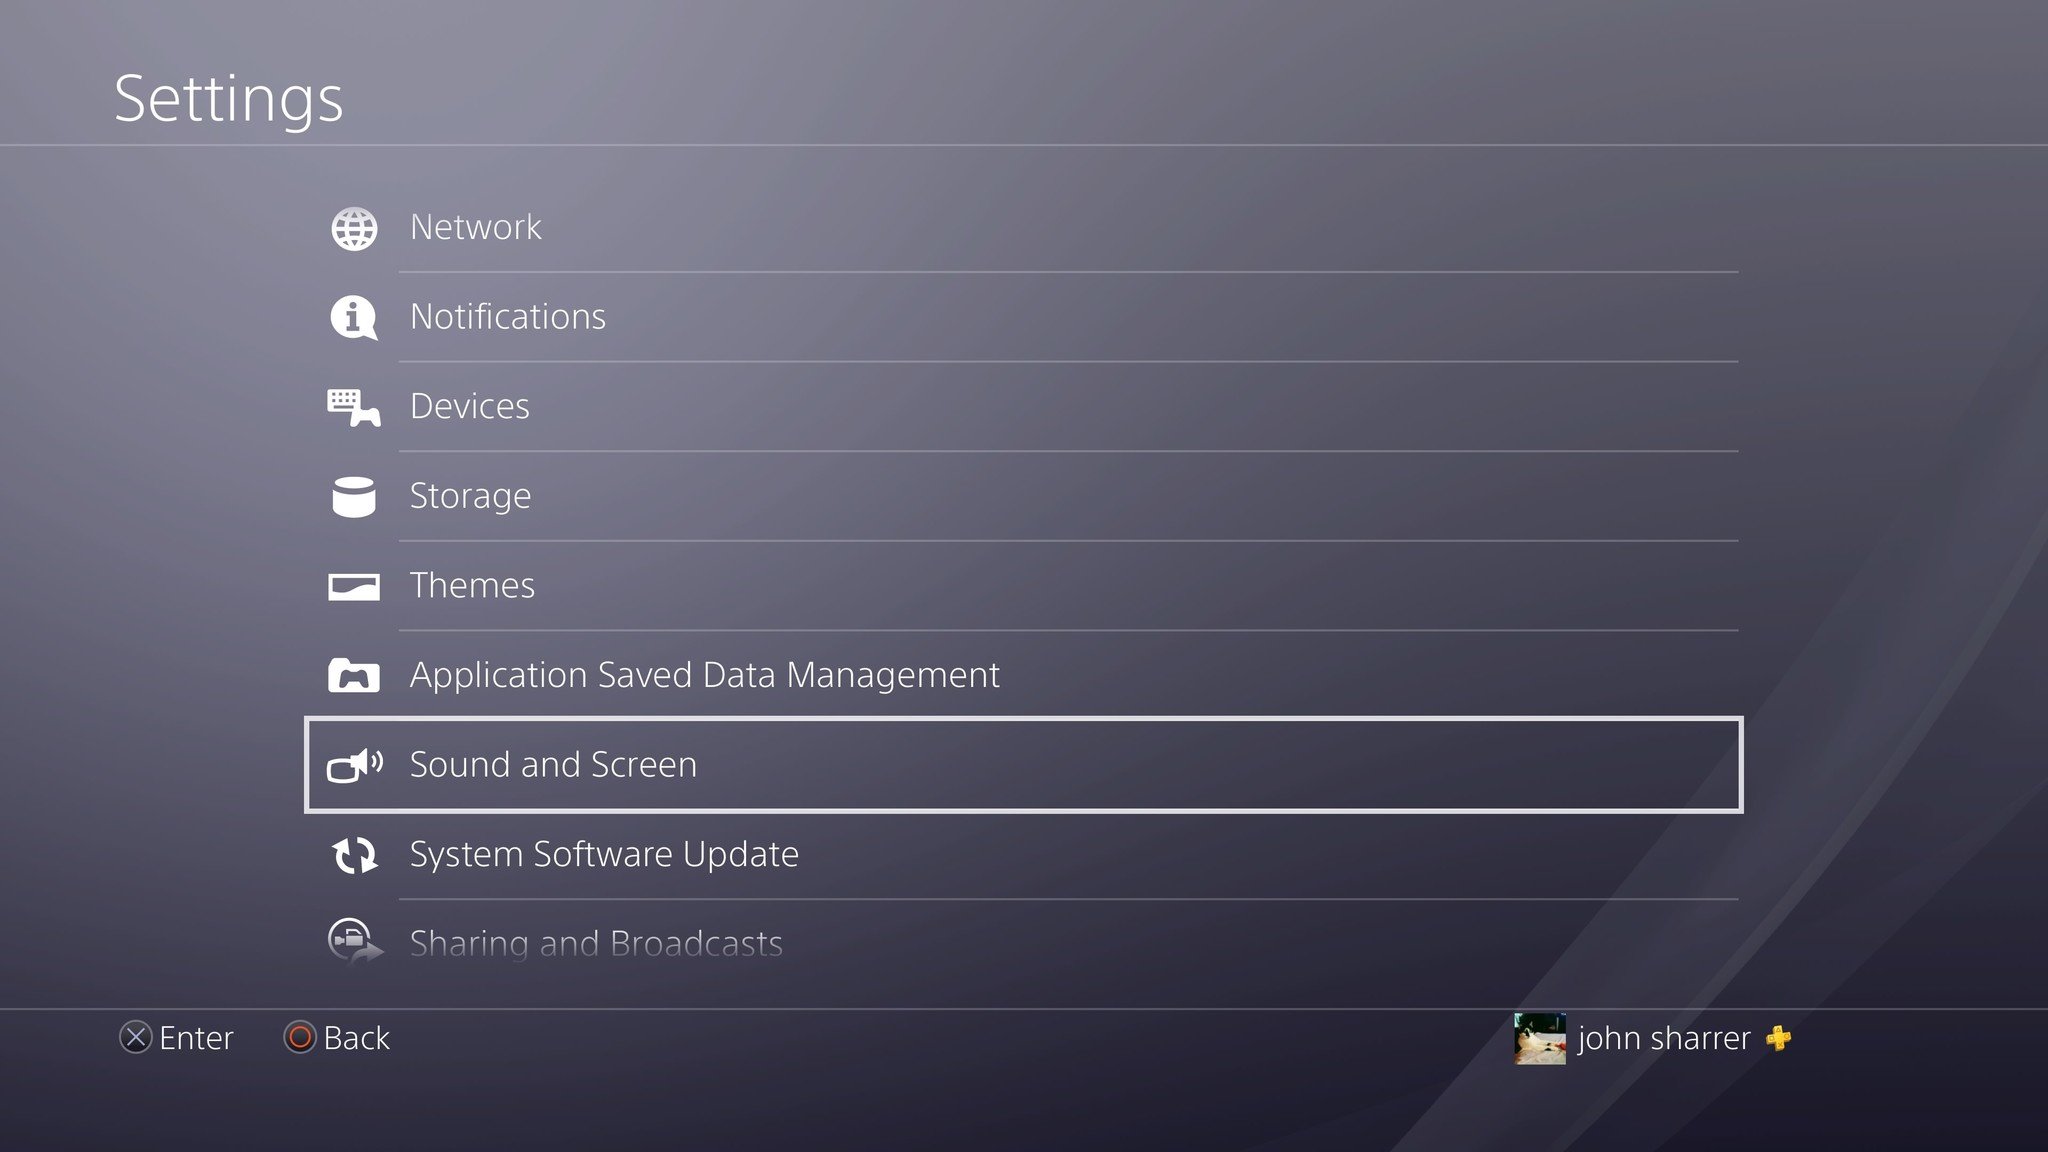
- Navigate to Settings from the home screen.
-
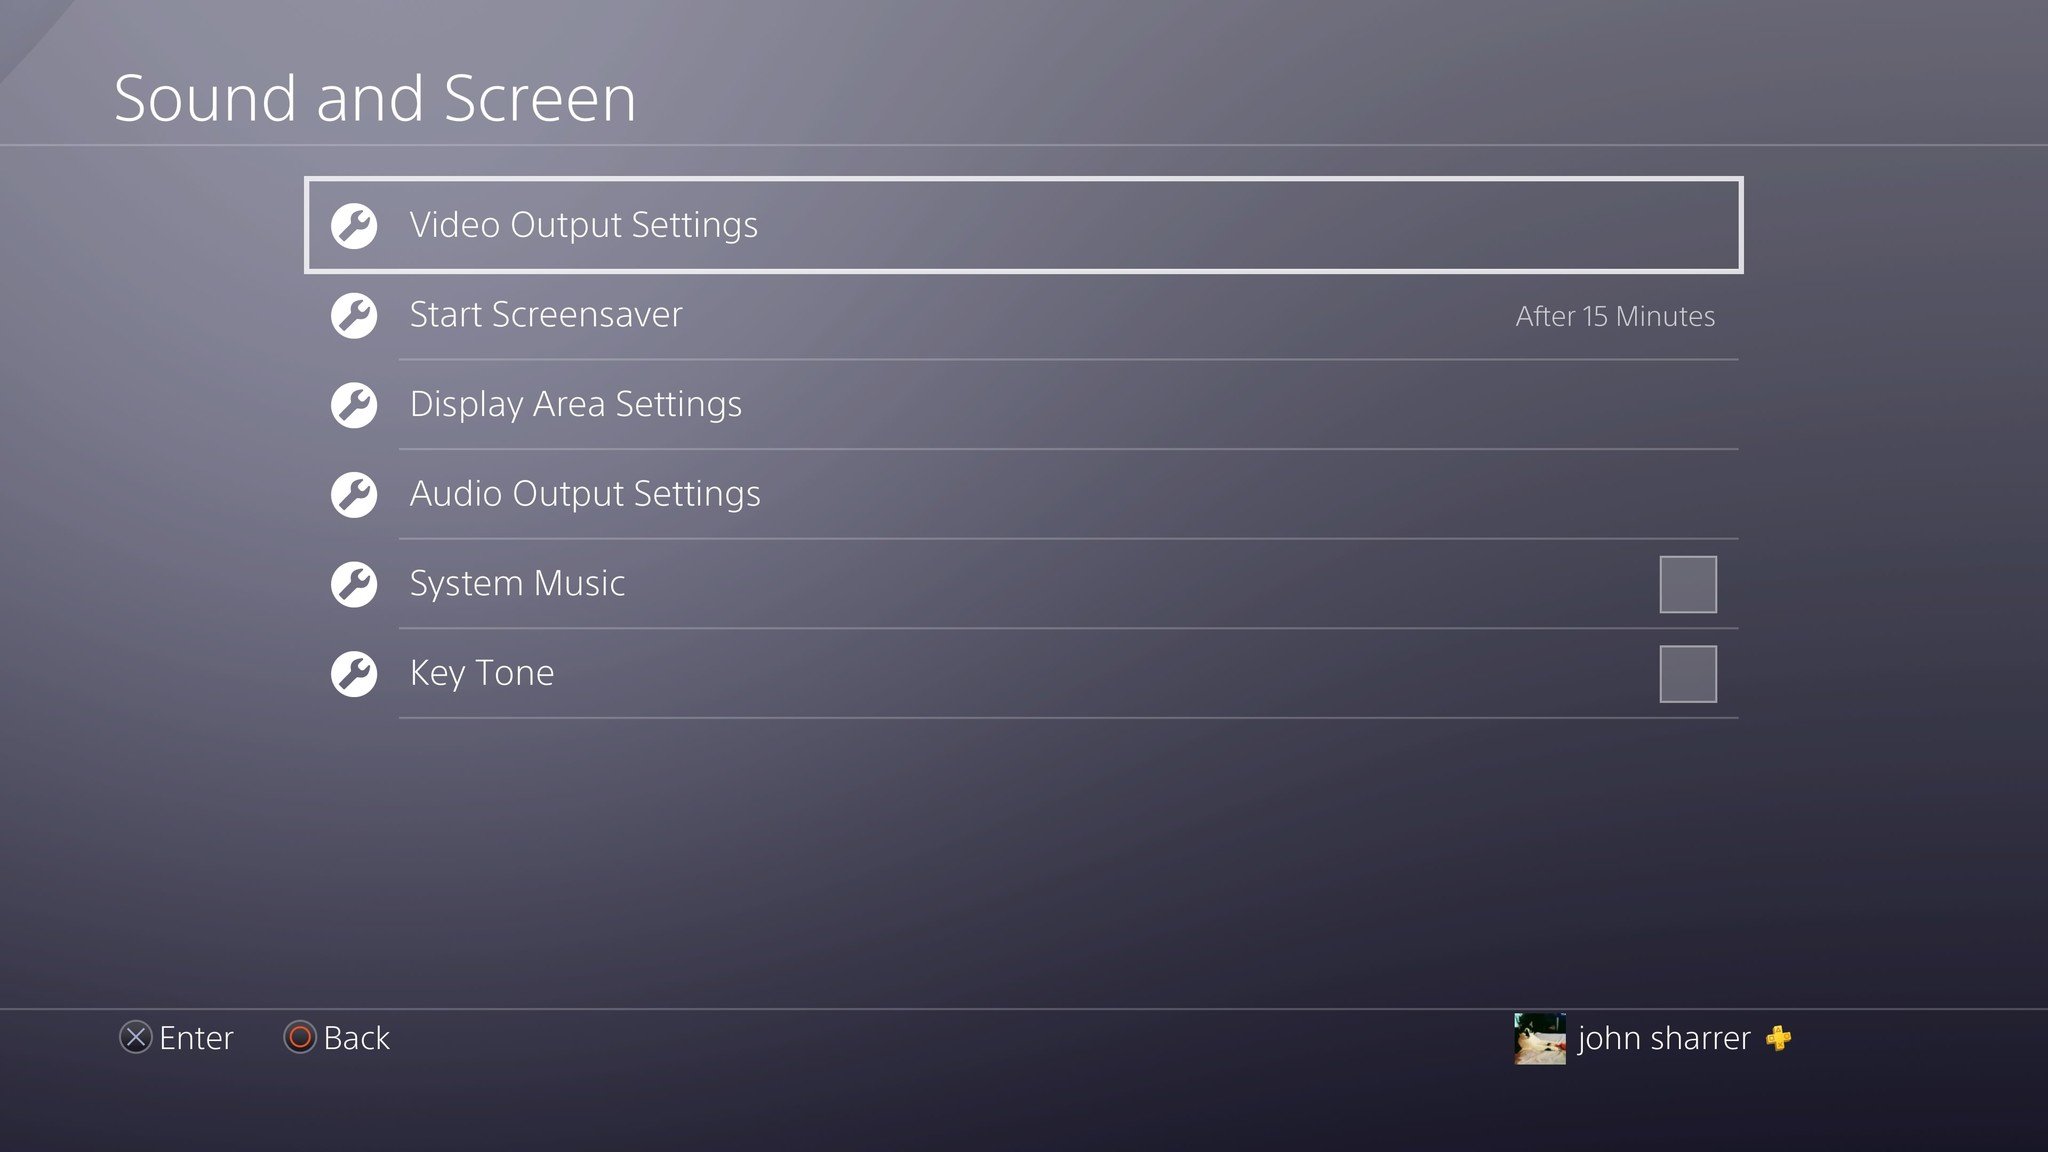
Select Sound and Screen.
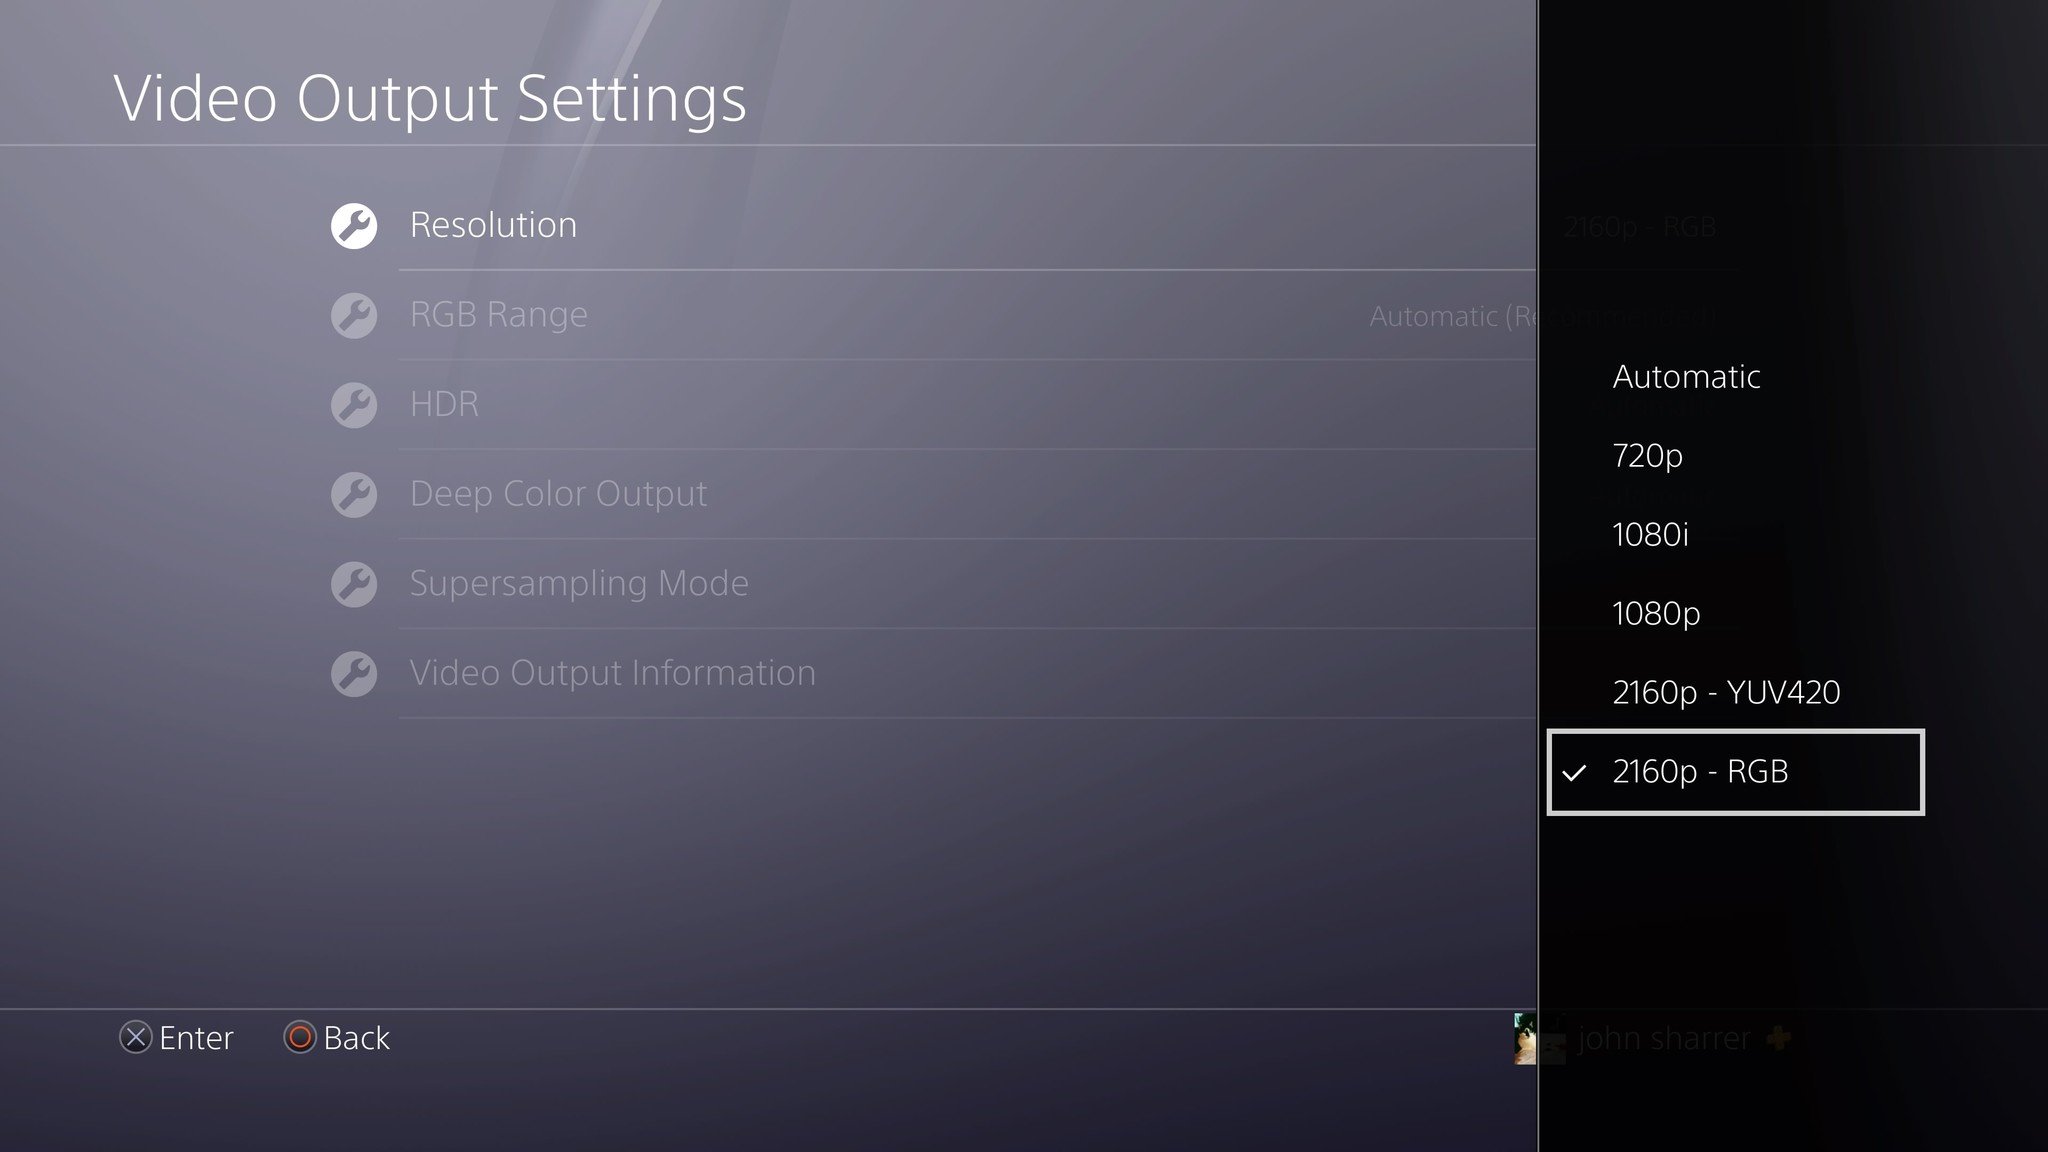
- Select Video Output Settings.
-
Set the Resolution to 2160p - YUV420 or 2160p - RGB.
2160p - YUV420 allows the console to connect to older 4K displays that don't support higher HDMI 2.0 bandwidth. 2160p - RGB doubles the bandwidth requirement, so this is what newer 4K televisions will support.
Choosing Automatic will also ensure that your PS4 Pro defaults to the highest possible resolution for your specific display.
How to enable 4K for specific games
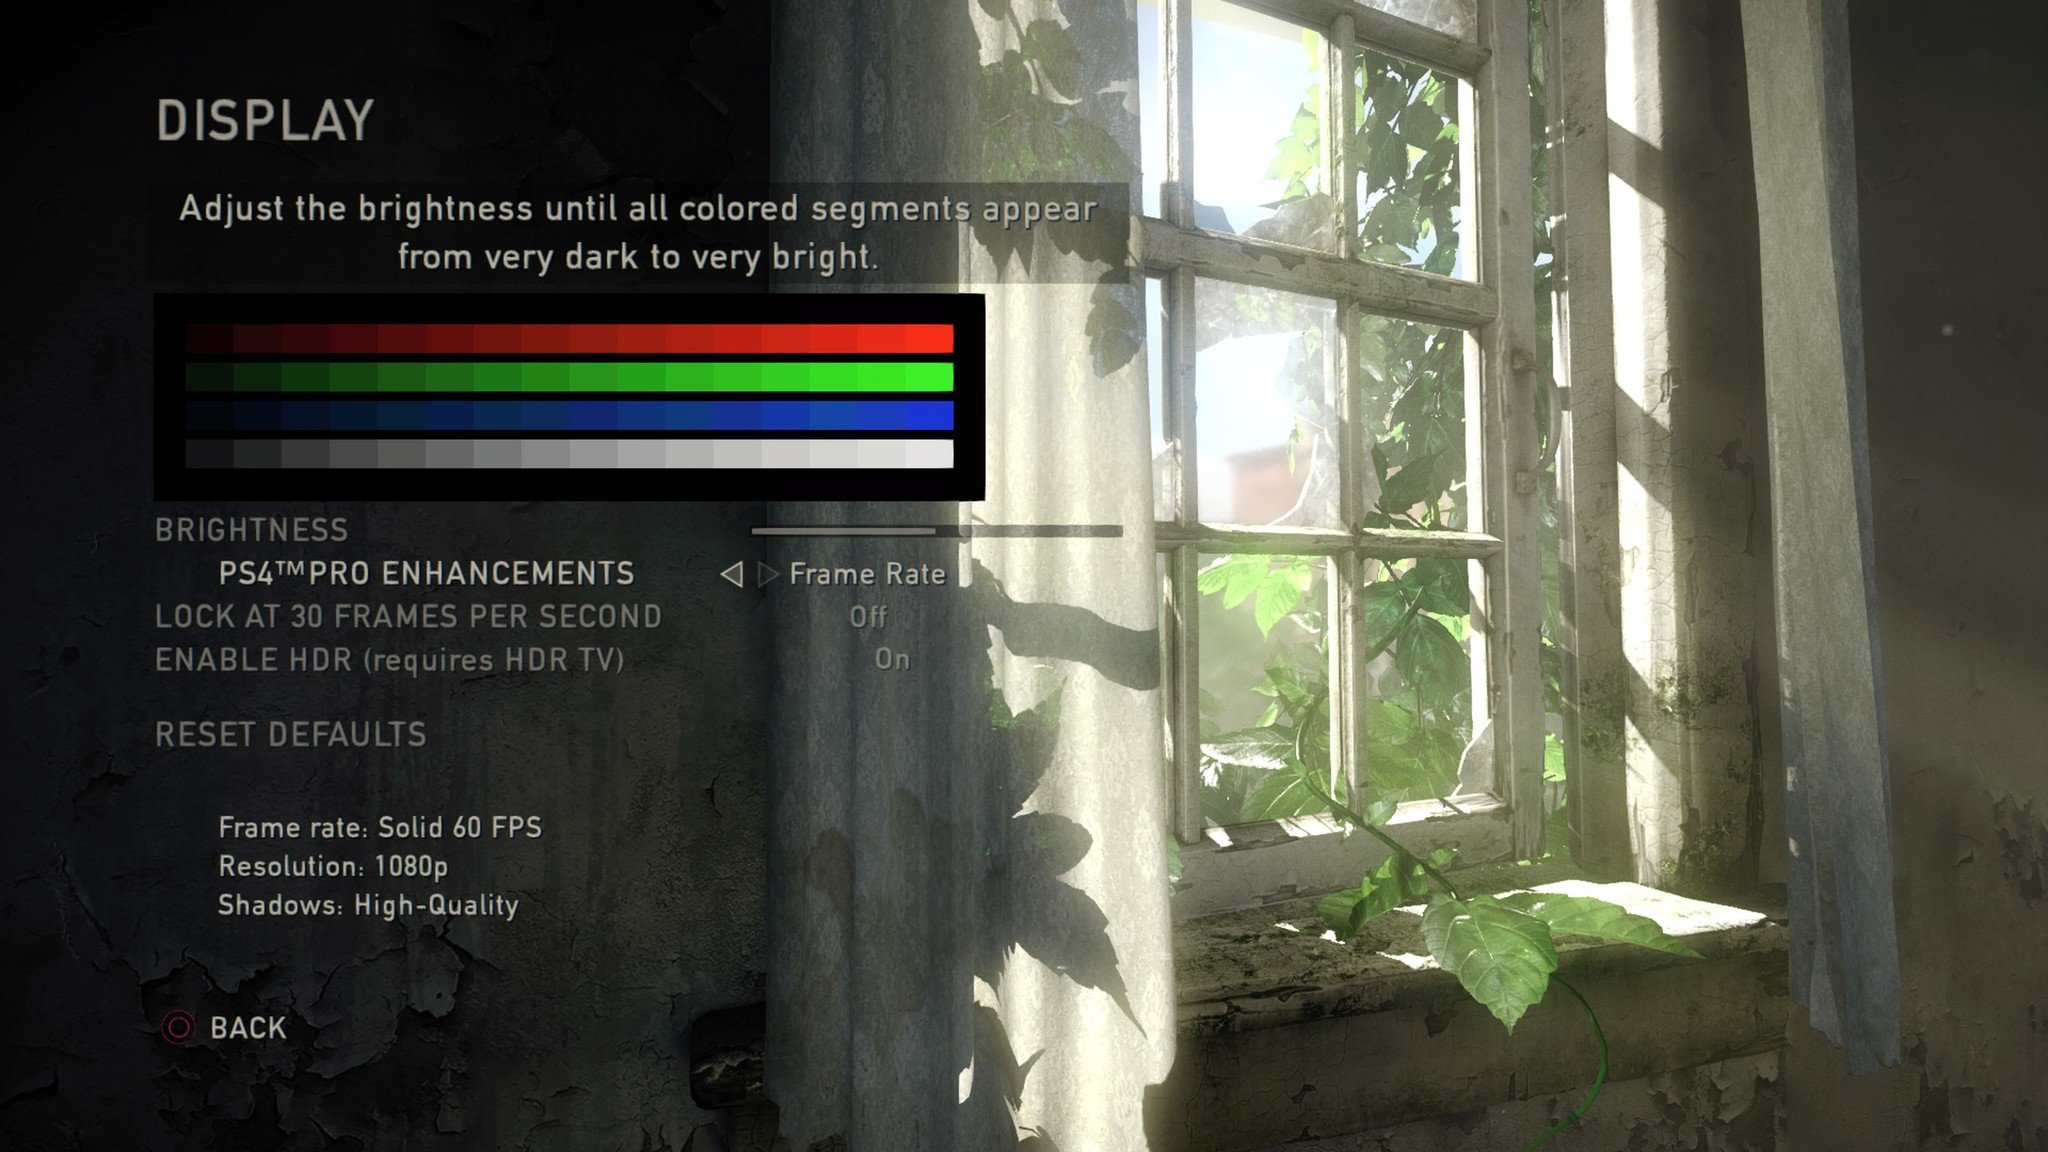
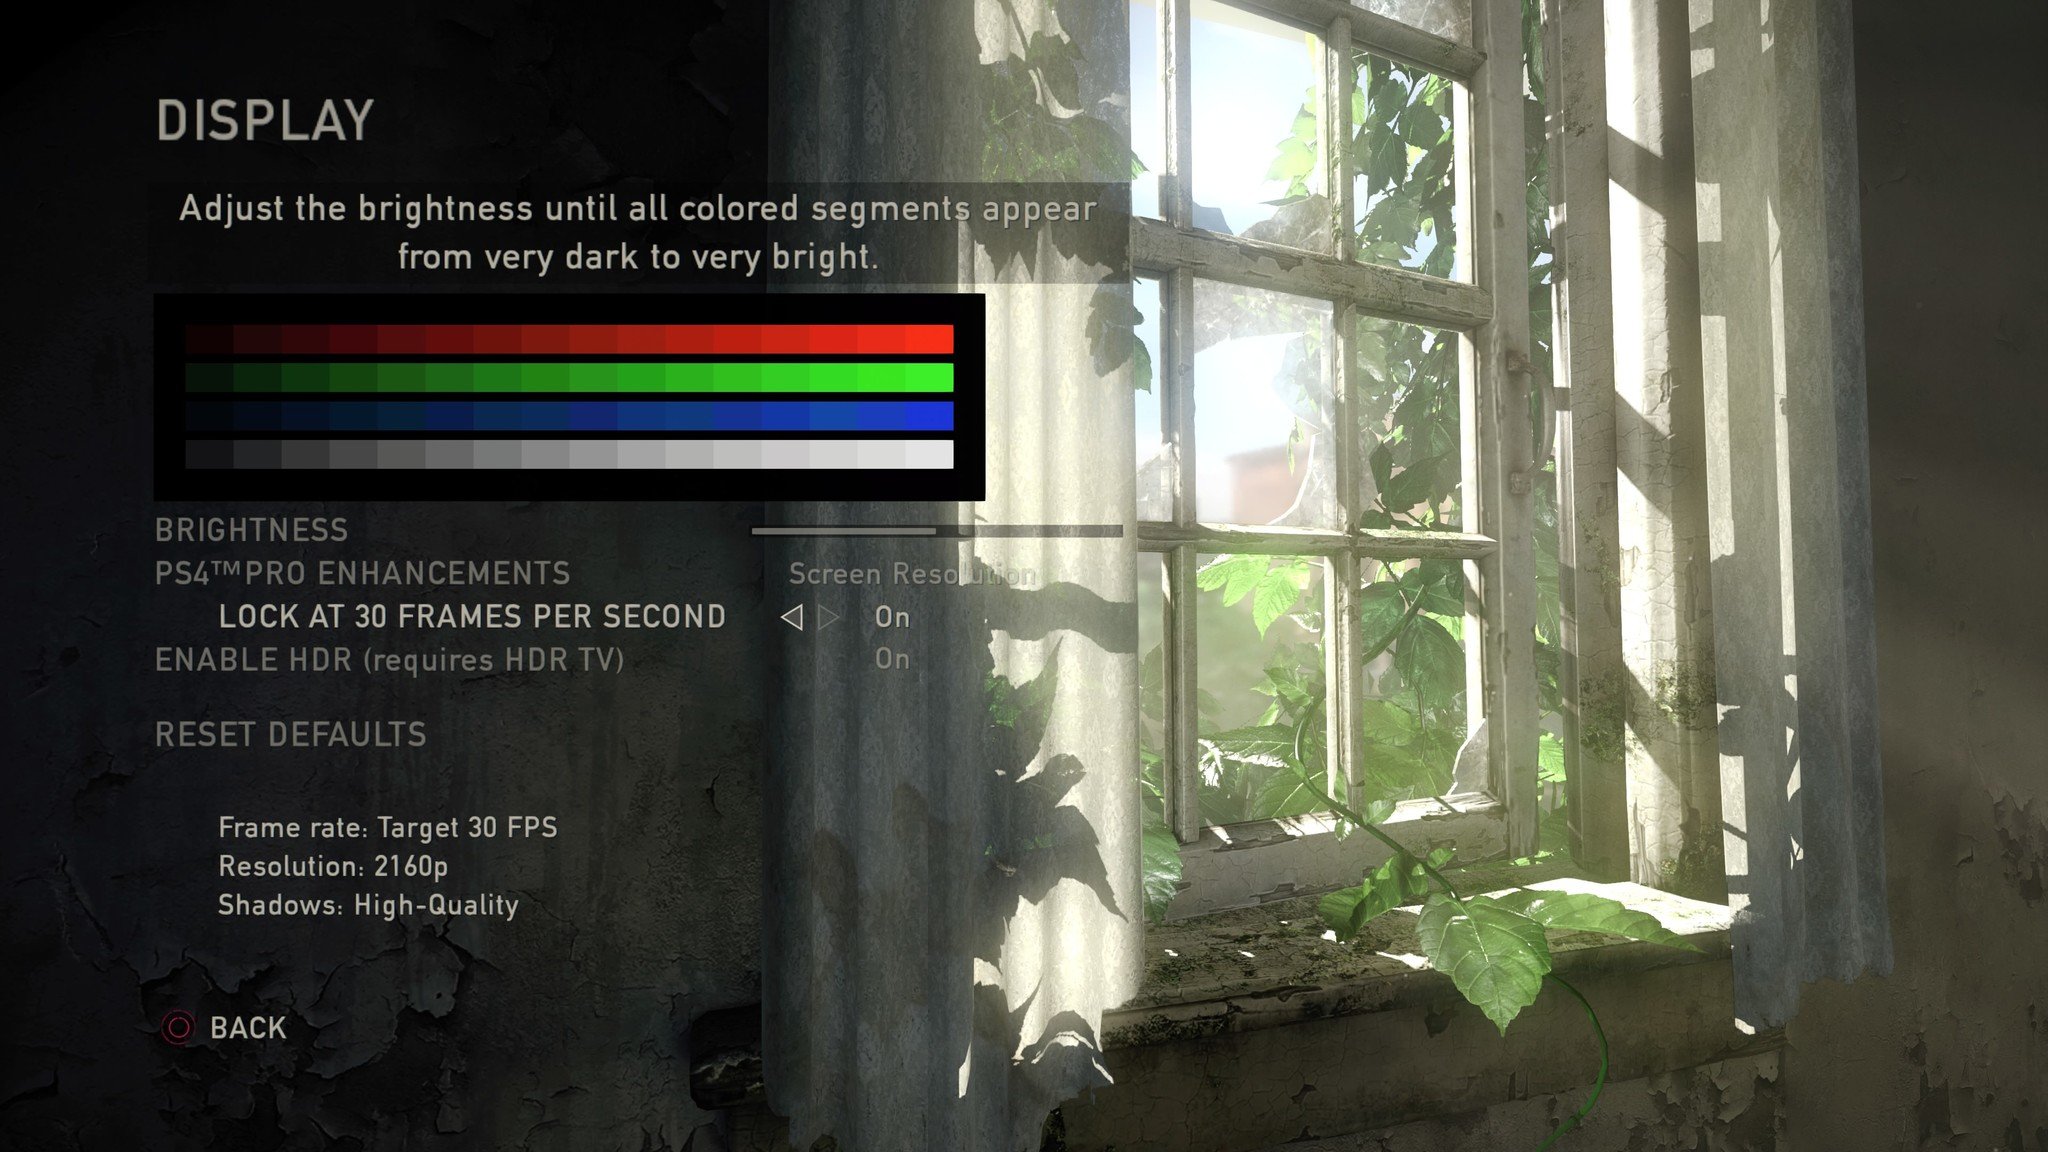
Certain games, especially on PS4 Pro and Xbox One X, feature multiple graphics options for you to choose from. These usually consist of a 4K at 30FPS mode or a 1080p at 60 FPS mode, but not always. If a game defaults to one or the other and you want to switch it, you can find these options within the game's settings. We've provided an example of what this will look like in The Last of Us Remastered.
Need some help enabling HDR?


Tidak ada komentar:
Posting Komentar